
So I’ve had the chassis and metal done for the 6CY7 V2 amp since the 4th of July. It has now been a full 13 days and… the paint is not yet fully cured. It is hard for me to remember it ever taking this long for a semi-gloss enamel on metal to cure hard enough to begin assembly work. Obviously the manufacturer has changed the solvent makeup of the paint I use. Time to find another manufacturer. In the mean time, I’ve been working on other things.
When I moved the last time about three years ago, the house I bought came with a 10 foot by 12 foot freestanding tool shed. It’s a good place to store garden tools, lawn mowers, and the like. But there was only one problem. It had a thirty year old cedar shake roof that had seen better days. It had clearly not been maintained, had developed a few holes and leaks, and had lost a goodly number of shakes to the seasonal winds (in our climate, such roofs need to be regularly cleaned, loose shakes replaced yearly, and they need to be treated with cedar oil every other year). Upon detailed inspection, it became clear that the old roof would need to be striped and replaced. So I scheduled a few days off work and decided to tackle the job.
First, let me say that there is a universal truth that the physical capability of youth tends to wane with the passing of years. I previously learned that at 45 (the last time I did any roofing) it takes twice as long to replace a roof than it did at 20. And now I’ve learned that at 55 it takes about twice as long as it did at 45. As such, my “few days” have turned into a solid week of work. In my own defense, it was not all due to my slowing down. After stripping the old roof I found some water damage to the underlying structure which need to be repaired, I decided to extend the overhang on two sides to provide some seasonal storage along those sides of the shed, and I decided to transition to a sealed eave design with a solid deck and modern shingles. This was to keep the birds out of the rafters and to make the shed more weather tight. All this led to a couple of days of carpentry work on the underlying structure between the stripping of the old roof and the application of the new singles.
There is a soft rain falling this morning so I probably won’t get back on the roof until this afternoon. Which probably means finishing up late tonight or tomorrow. So the new amplifier will have to wait a couple of more days.
This morning, as the rain was falling outside of my window, I was looking at my new 6CY7 design and contemplating the changes I’ve made. It important to realize that when I first designed this circuit, I was playing with some budget output transformers that get very mushy at the low end. Some of my design decisions at that time were compromises for those output transformers and they persisted in the original schematic. Here is what I’ve done to improve on the original.
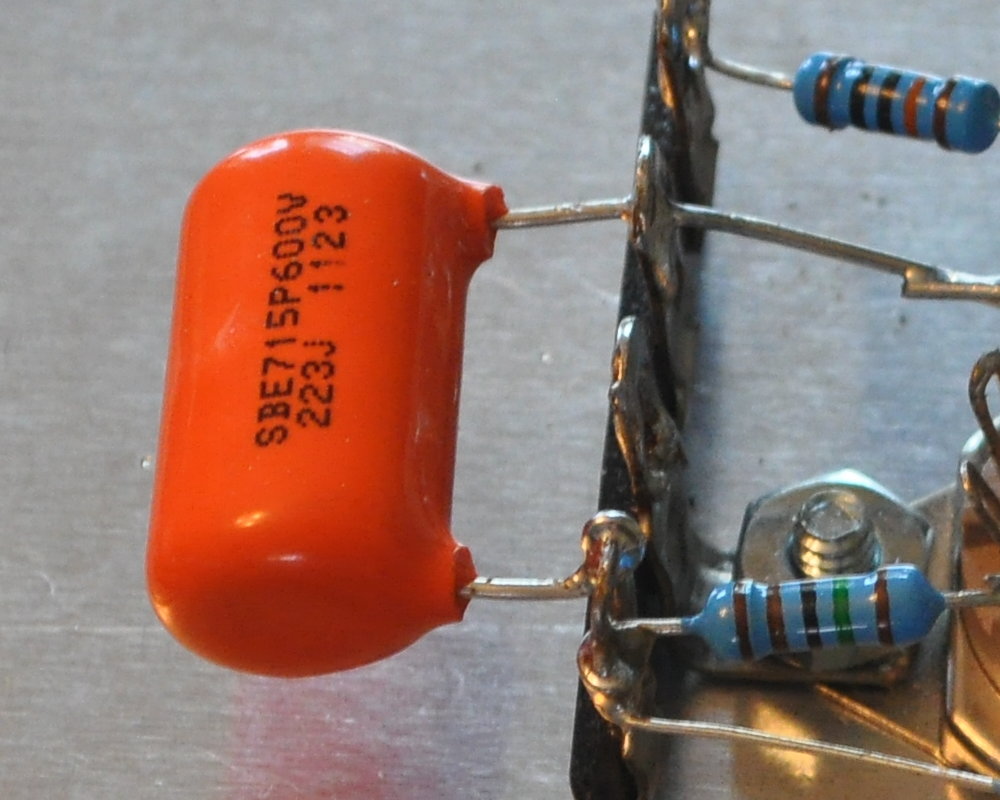
The first change I made was to go with the Edcor GXSE10-5k output transformer. This transformer has a larger core for better performance at low frequencies and sports a larger primary inductance reducing frequency degeneration due to plate resistance. The primary inductance is not so large however as to suppress the transient performance of the power stage. The other change, also to the power stage, was to increase the cathode bypass capacitance to 100µf. The cathode impedance of the power stage is only 510Ω so the 100µf capacitance still puts the -3dB cathode rolloff at 3.1Hz (τr ≈ 51mS). As this is not a high power amp it should not usually be pushed to its limits in normal usage. I felt that compromising on the blocking recovery time was an acceptable compromise in this case.
In the driver, I have increased the coupling capacitor to 0.033µf. The original 0.01µf was due to the output transformers I was using at the time and it persisted into the original design. This places the coupling low frequency rolloff at 4.5Hz (τr ≈ 35mS) which is more in line with my 400bpm recovery limit. Although i should note, when I built my own 6CY7 amp in the walnut case, I actually used a 0.022µf coupling capacitor rather than the 0.01µf listed on the schematic.
There are also a set of changes in the power supply section. These were not so much because there was anything wrong with the original, but rather to supply a different design with a little more margin. I replaced the power transformer with an Edcor XPWR257. This provides some more margin in the high voltage primary and the filament supply. It also gives a cooler running solution as the temperature rise per VA is much lower in Edcor verses Hammond power transformers. And it give’s a uniform “Edcor Blue” look above the main mounting plate. I also increased the fuse from 1/2A to 1A slow blow to support the higher inrush of the bigger Edcor power transformer.
I replaced the Hammond 2H 154M chokes with 5H 155H chokes. This improves B+ filtering and channel to channel separation; helping to ensure a nice wide and deep soundstage. The primary 5H Hammond 193H filter inductor has been replaced with a 5H open frame 156L to save space and because it will be going under the plate in this design. And finally, the signal section B+ dropping resistor of 6.81kΩ has been replaced with a 4.99kΩ (or 5kΩ) as it’s a much more common value.
So these are the changes from the original design. I am hopeful that this will give the amp a somewhat more full low end and will give it an even better soundstage. I will be running the new amplifier through a full set of testing so I can draw a good set of comparisons when I am done.
Now if I can just get the paint to fully cure…
Slow at 55? Wait til you hit 65 – I’m crawling along in reverse now! 😄
I figure if I can still tear off a roof, rebuild structure, re-sheet the structure, lug shingles to the peak, and reroof the thing, going slowly is a small price to pay. It’s supposed to be a 30 year roof and by age 85, I’m not really going to care if the tool shed roof leaks a little.