
So I had another productive day working on the Source Selector Unit / Preamp chassis. The chassis has all the major woodworking complete and is ready for glue up.
In addition to the chassis work I completed today, I also made some new chassis templates. For those who don’t know, I like to use templates to make the cutouts in all my chassis. That way, layouts can be reused on projects down the road. Over the years I’ve built up quite a collection of these miscellaneous cutout templates. I’ve also received a lot of questions about my process for building chassis so I though I’d take this opportunity to give a little insight.
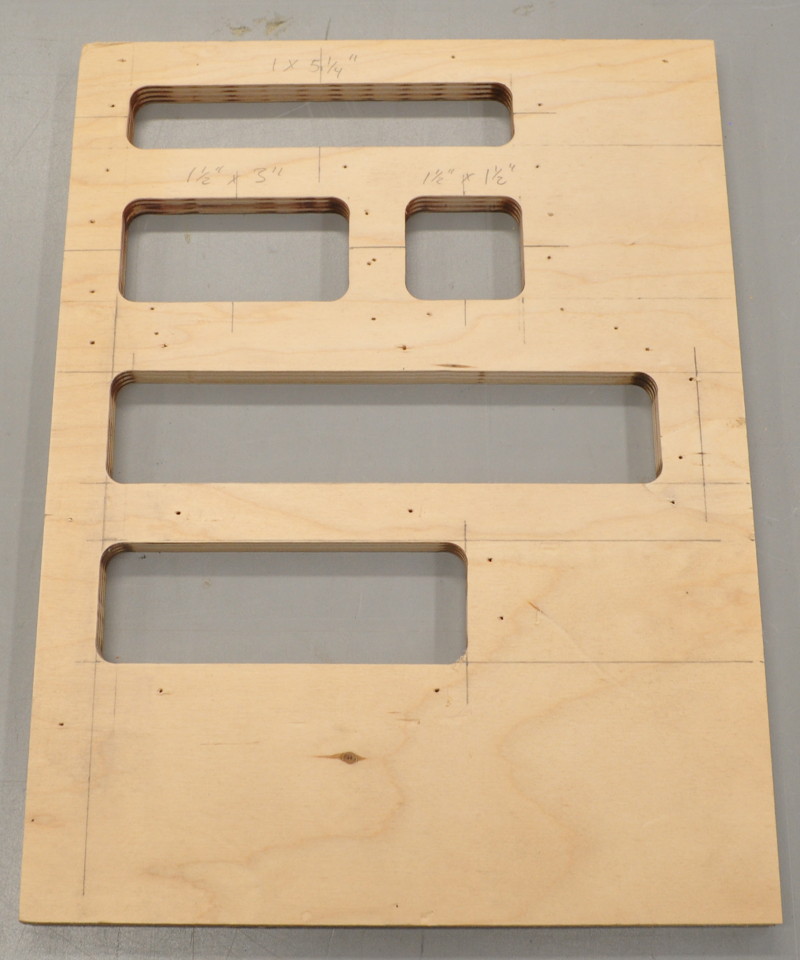
First, here is my collection of templates as of this morning.
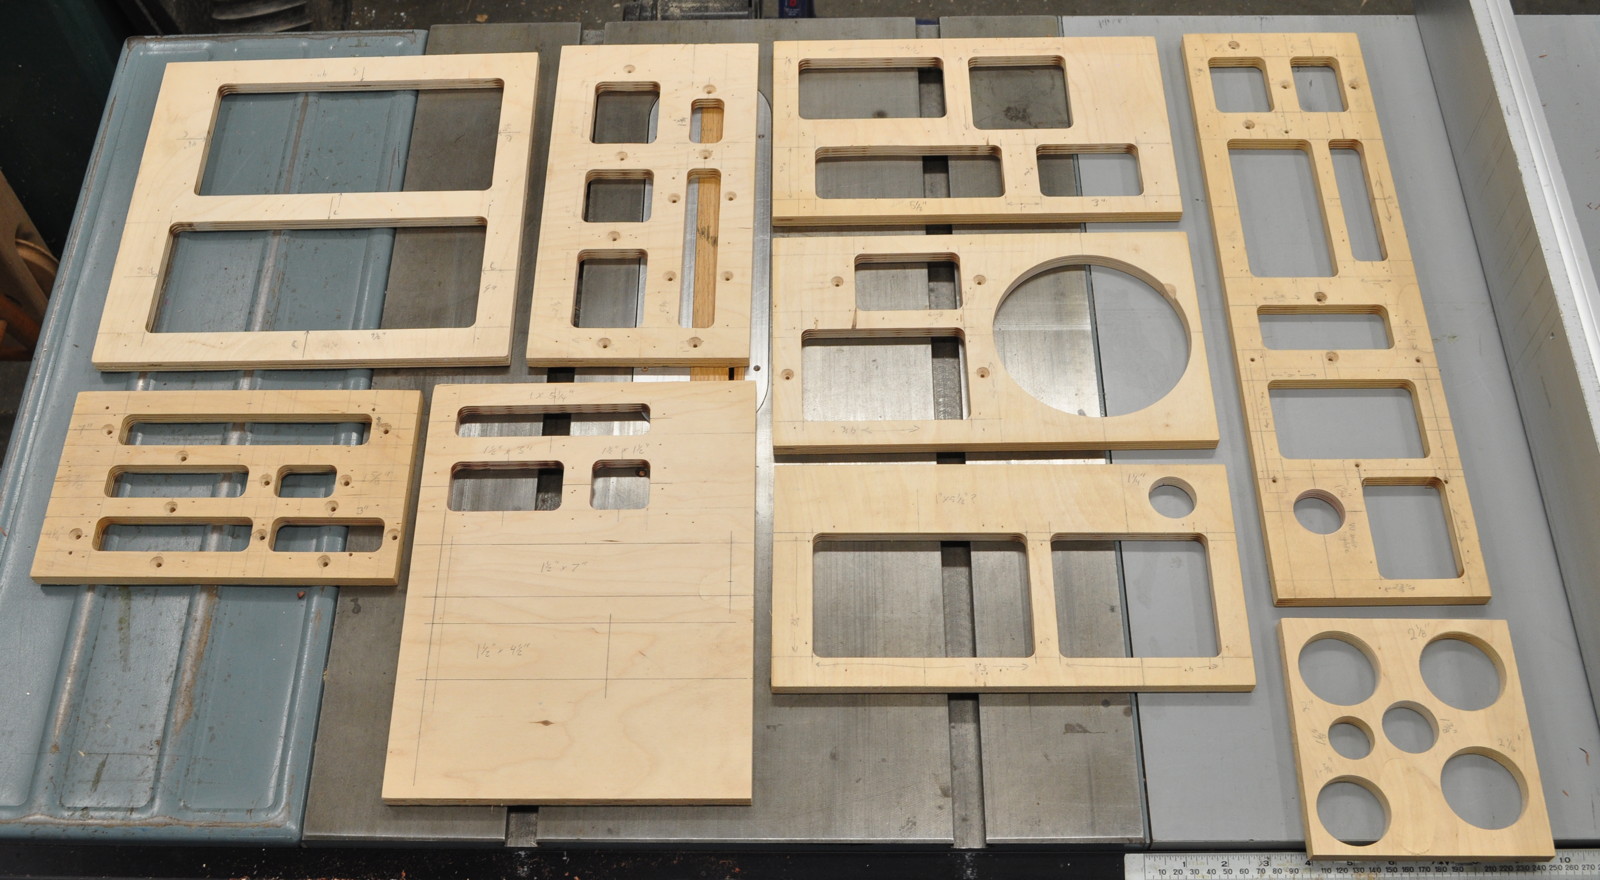
These are all cutout sizes I’ve use on at least one project. The vast majority are for amplifier chassis; most of the circles being a notable exception. However, in spite of the number I have, I had nothing that was suitable for the rear panels of the Source Selector Unit chassis. So two new cutout templates were in order.
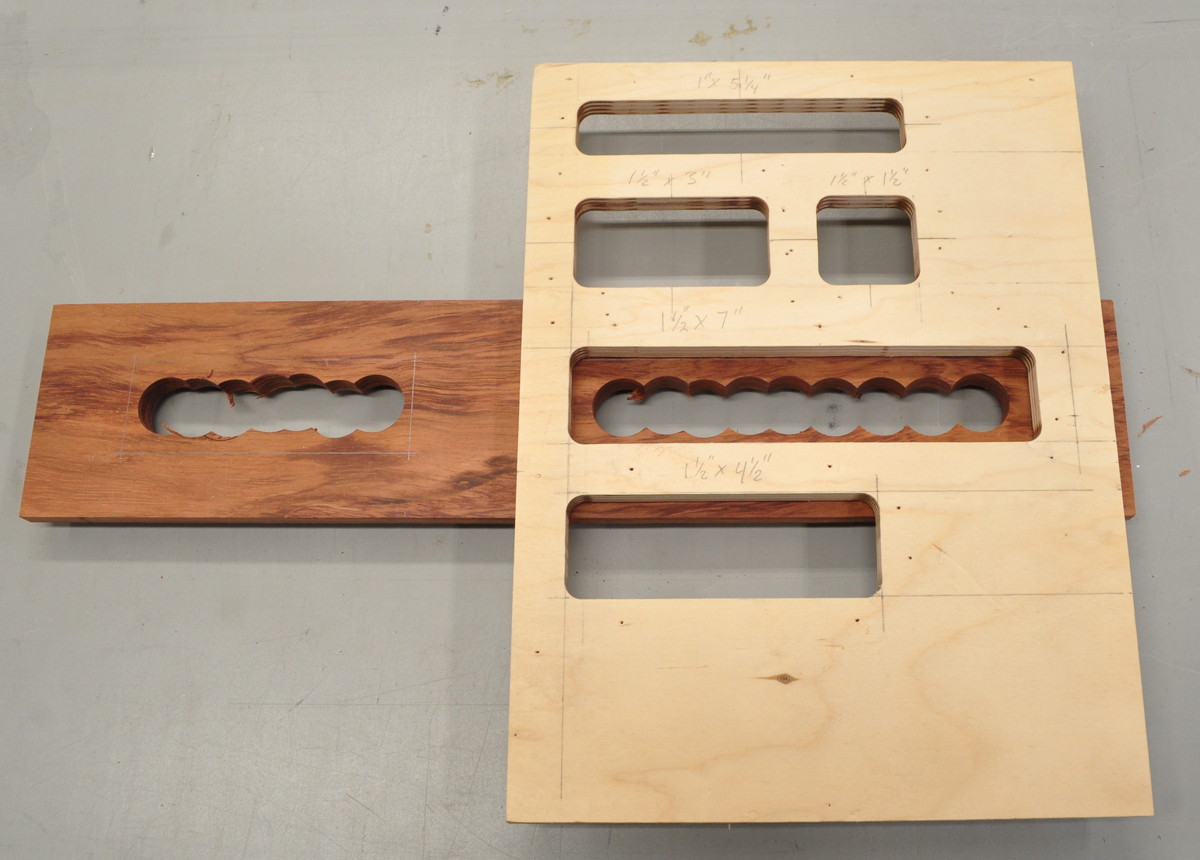
If you take a close look at the board on the bottom, second from the left, you can see that there are a couple of new holes already laid out on the wood. These are 1-1/2″ tall openings for the signal connectors panel and power panel on the back of the Source Selector Unit.
So here is the process I use for generating a new cutout template. First, as is shown above, with a sharp pencil I carefully lay out the dimensions of the opening I need. Once this is done, I then tack some small straight pieces of wood on the lines, so that a temporary frame surrounds each layout. This is what that looks like.
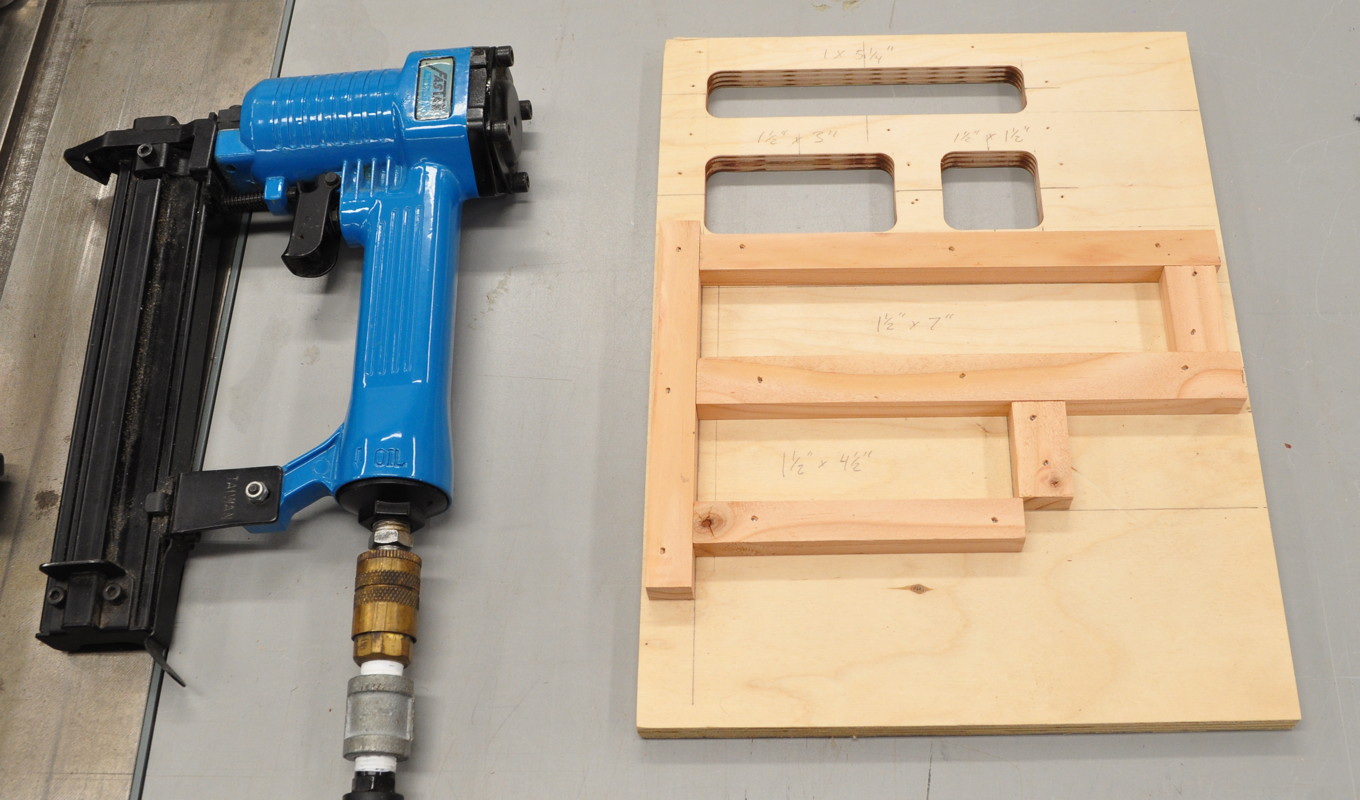
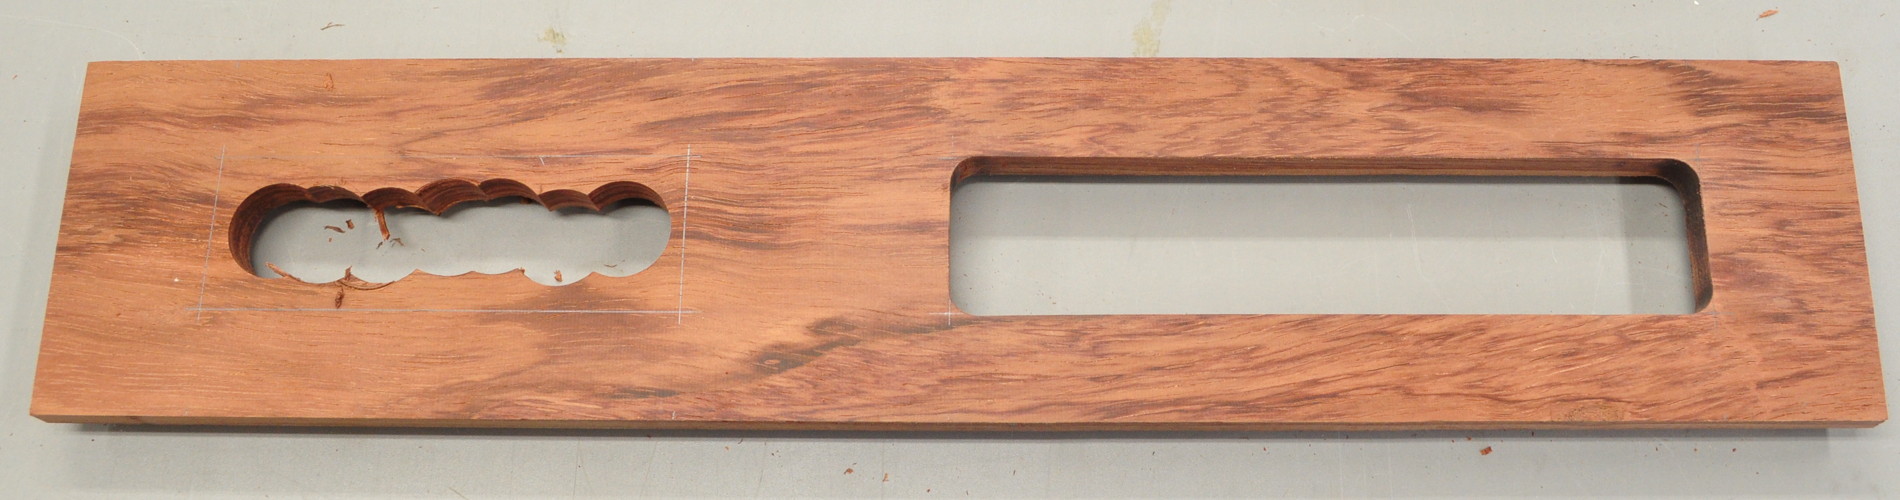
These pieces of wood provide hard straight guides for a router bit guide bearing to ride upon. Once these are in place, I remove most of the material within the lines to make the routing easier. This is just a rough operation performed freehand. Here is how it looks after that material has been removed.
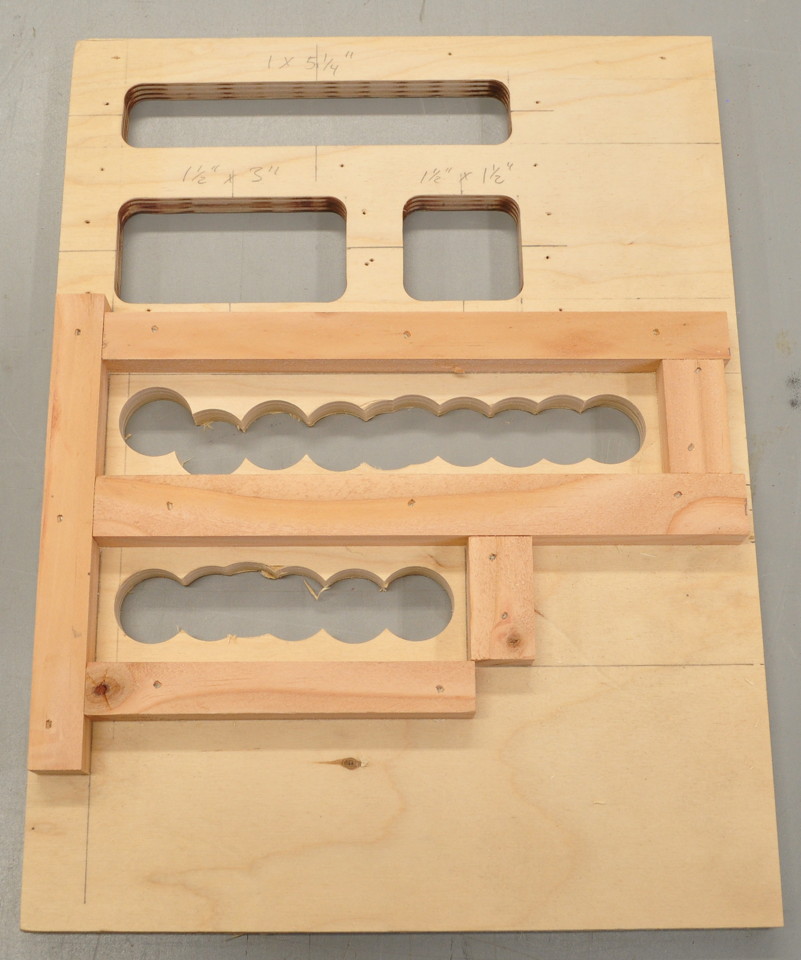
It’s not critical that the holes be centered or carefully laid out because the remaining material will be removed in multiple passes. Once in this state, I mount a 1/2″ flush trim bit in my router table and adjust the height so that the bearing rides against the tacked on pieces of wood. Carefully laying the opening over the router bit, I remove all the extraneous material in multiple shallow passes until the bearing rides against the guide strips all the way around. When complete the cutout holes look like this.
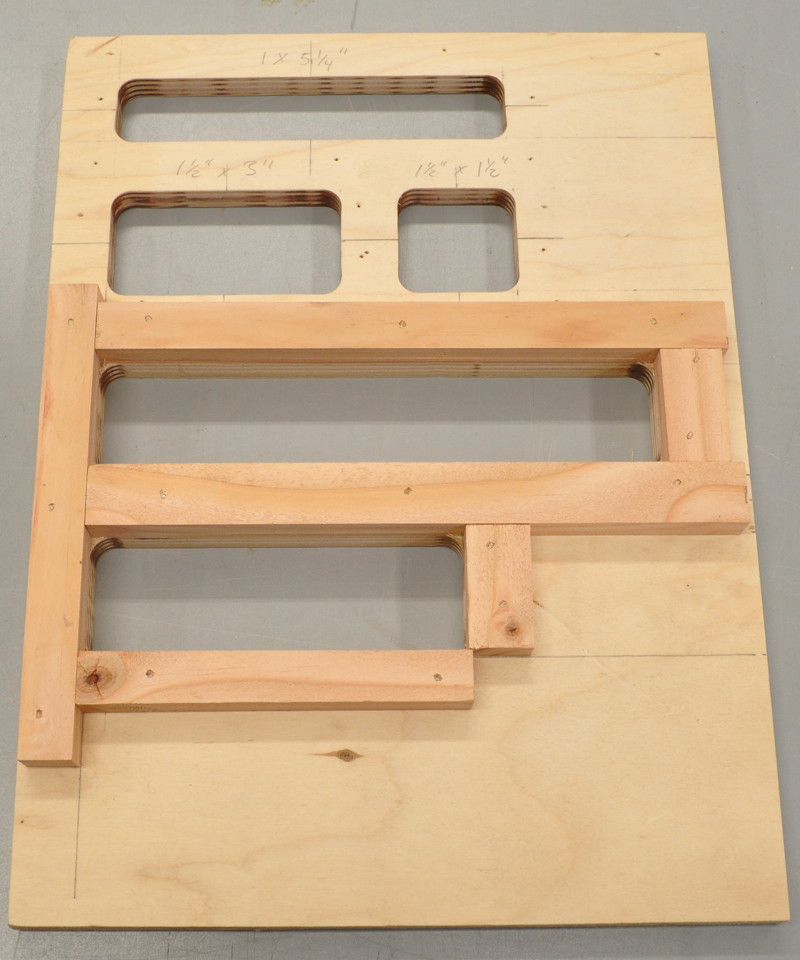
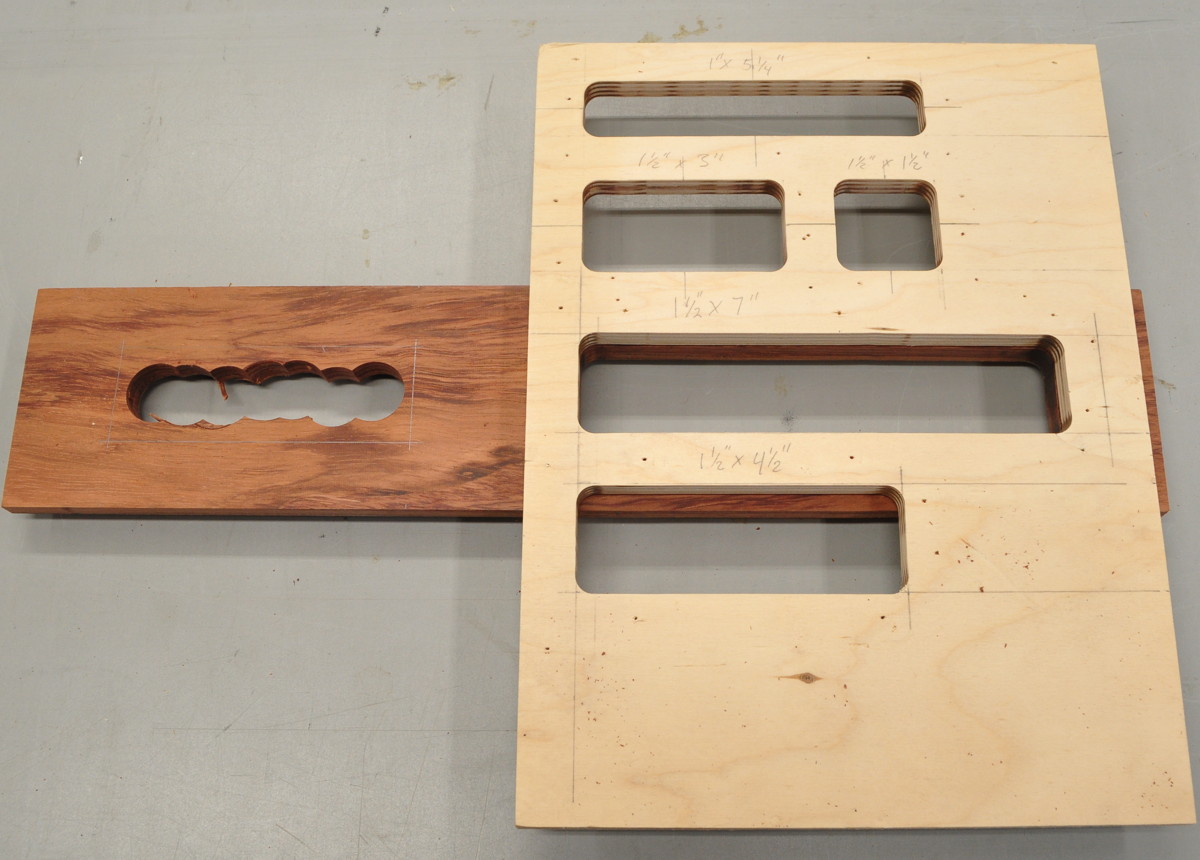
After this, I simply remove the tacked on wood pieces to reveal my new templates. They look like this.
Now I have templates for two more 1-1/2″ tall openings in 4-1/2″ and 7″ lengths.
The process for using these templates is actually much the same as the process to make them in the first place. The first step is to carefully layout the opening location on the chassis piece. One laid out, the majority of the wood in the cutout area is removed and the template is affixed to the chassis wood with some double sided tape. It looks like this.
Then it’s back to the router table and, after readjusting the bit height so that the bearing runs on the template edges, the remaining material is removed in multiple shallow passes. Here’s how the opening looks when complete.
After this it’s a simple matter to pop the template off and remove the pieces of double sided tape, leaving a perfectly cut chassis opening.
All the other cutout holes in the chassis were cut in exactly the same manner. After the above picture was taken I simply mounted the appropriate template over the other layout and repeated the process.
In addition to getting my templates made, I managed to complete all the openings in the chassis panels. I may have to wait for a little warmer day to do the glue up but that should come later this week. Here is how the chassis looks waiting for the glue up.
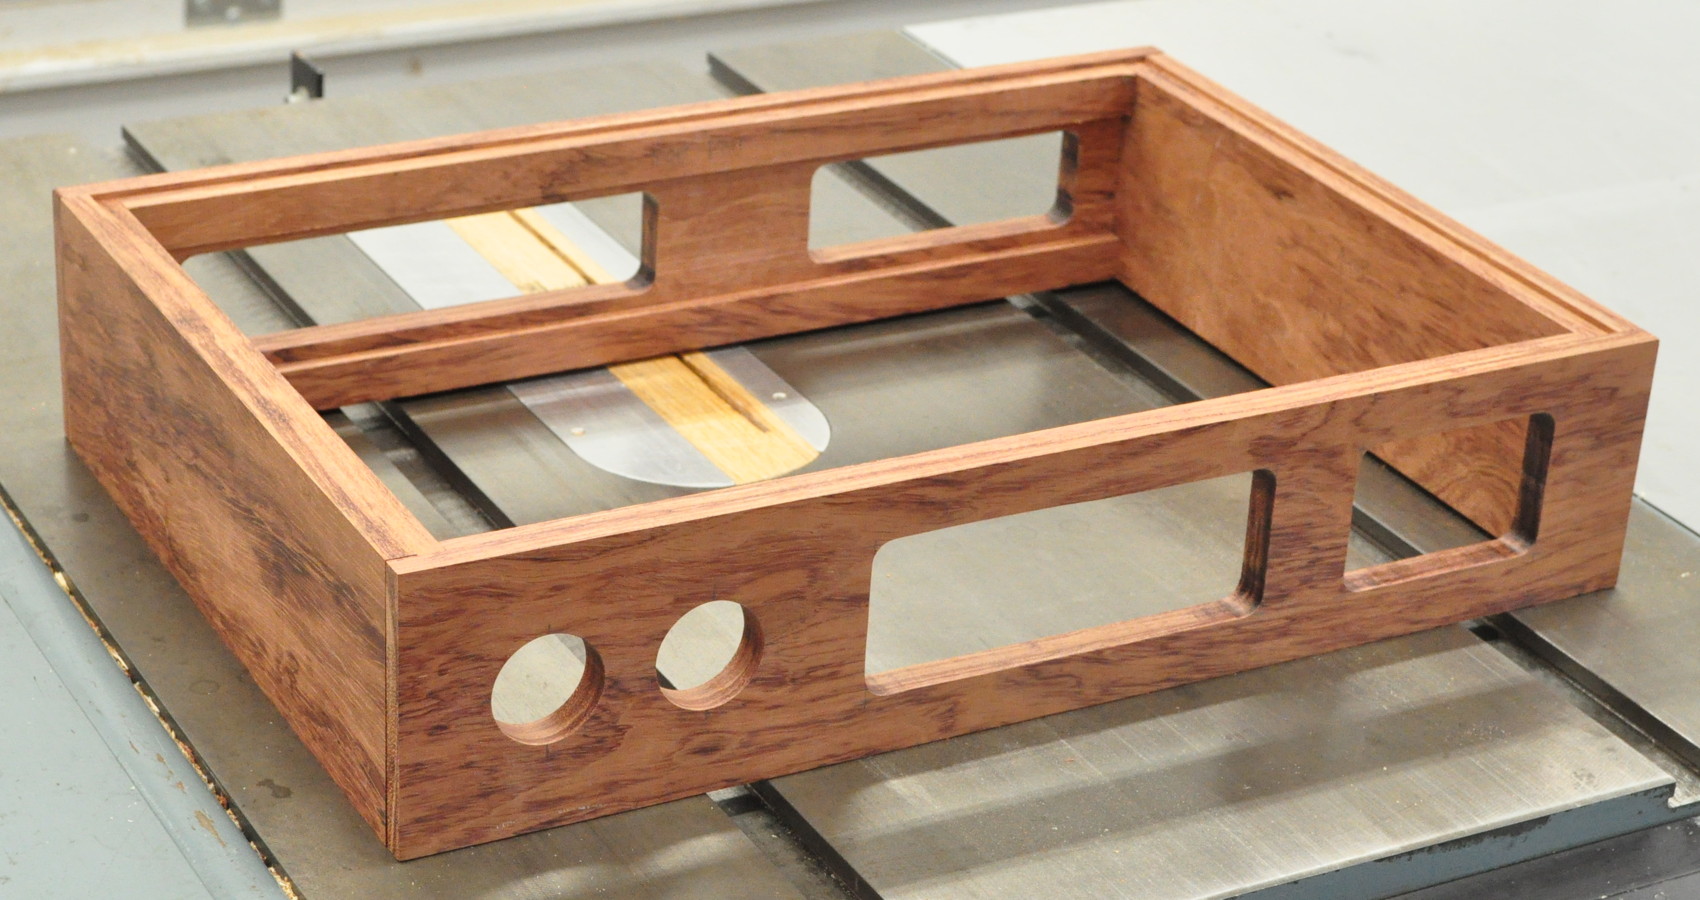
It feels really good to get to this stage after my long absence from my workshop. I think this chassis is going to look exceptional with several coats of a penetrating oil finish to bring out the grain in the bubinga.
As always, questions and comments are welcome.
Thanks for the behind the scenes look at your fabrication. The box is going to look fantastic. It is nice having the blog to read again – appreciate the time you take to document the process.