
It really is amazing how much I can accomplish when suddenly I can’t work on all the projects which have been keeping me busy for the last month. The SSU assembly is complete and I’ve done some testing.
As I said yesterday, there is a crew currently painting the outside of my house. Because their work is so weather dependent, they tend to line up jobs in the winter and spring, and then start working down the list as weather permits. I got on the list in February and they called last week to let us know that they were coming to start prep work.
This means that I can’t work on the deck I was finishing or the gardens around the house. I also can’t work in my shop because it’s being used as a storage space and thoroughfare. So this has left me with some free time to finish up the Source Selector Unit project.
The first order of business was to complete the installation of the vacuum tube assembly and finish up the wiring for the VU meter driver board. Here’s how that looks.
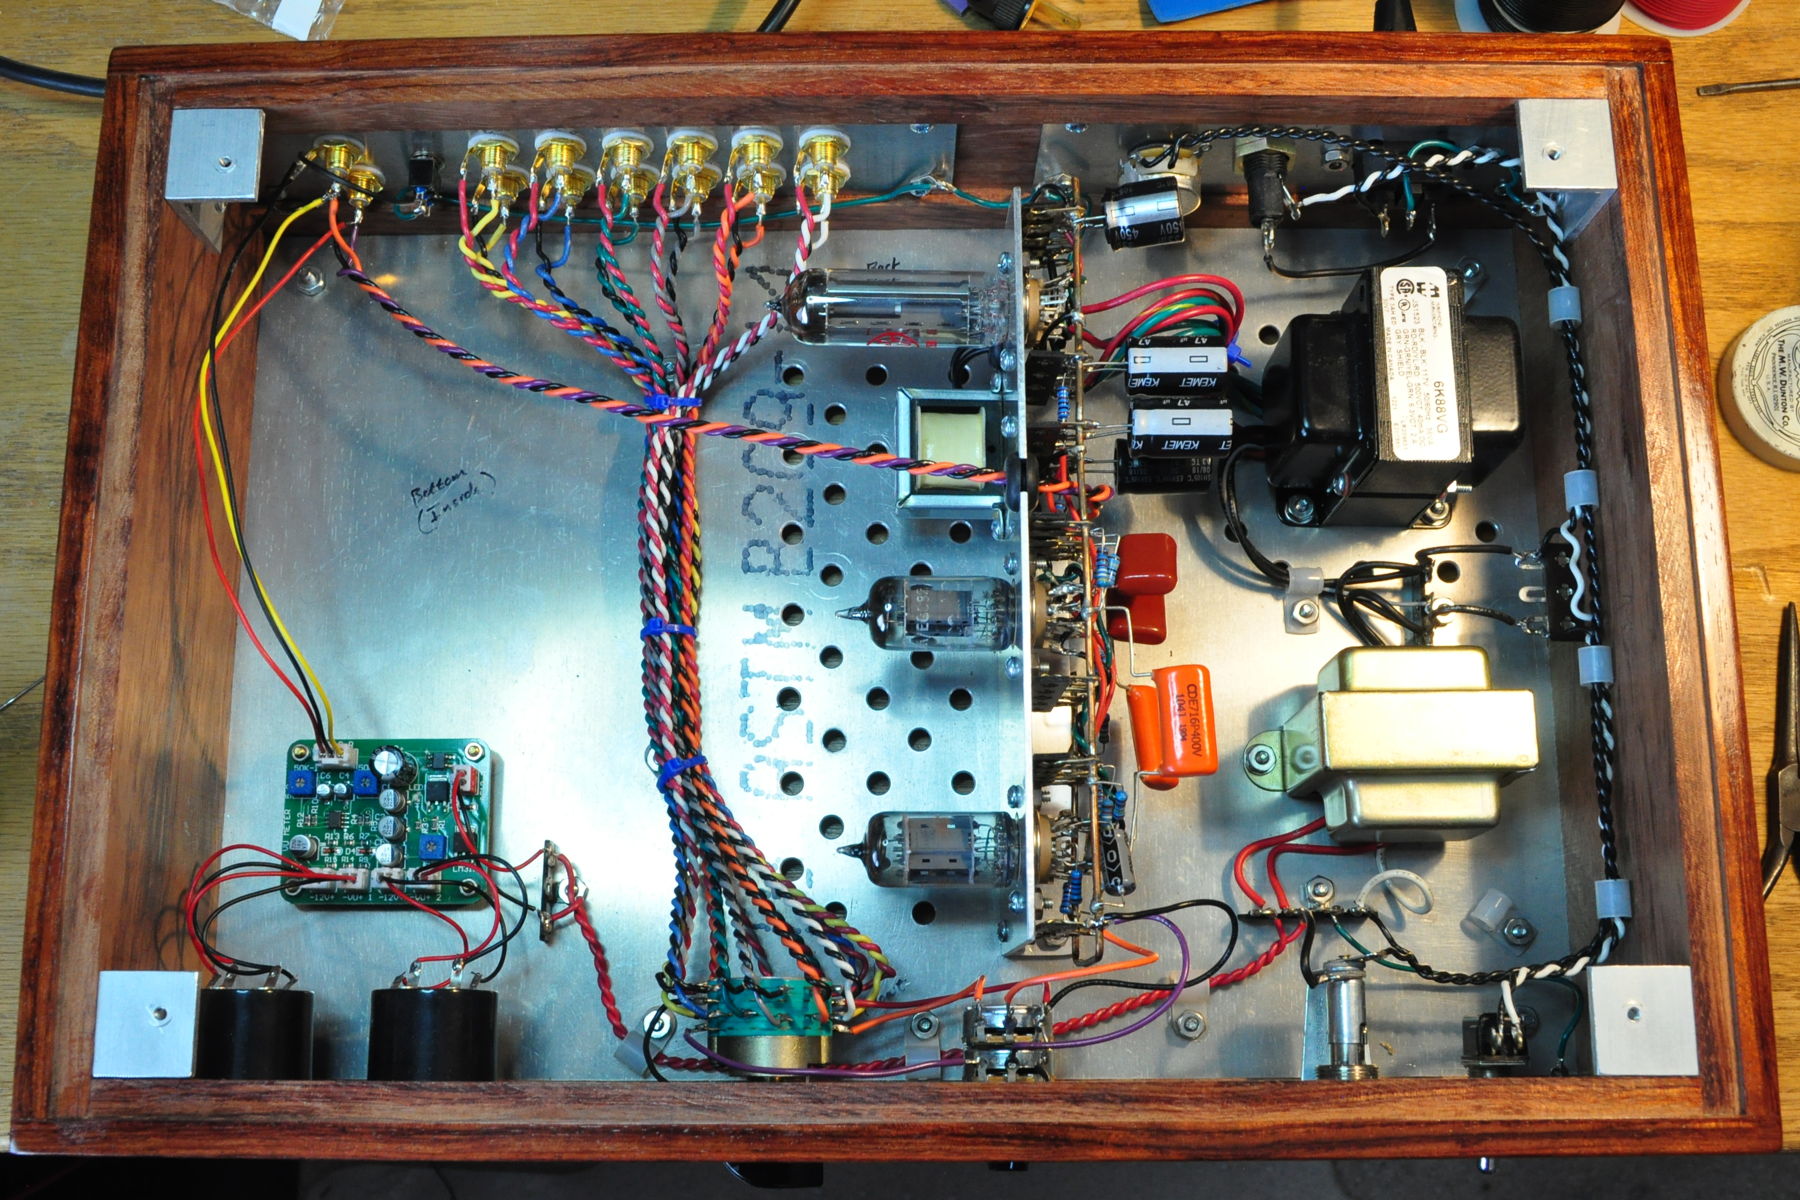
This is complete down to the wiring for the ground lift switch. The internals turned out better than I had hoped. There is lots of room to prevent electrical interactions and plenty of space to perform tube swaps.
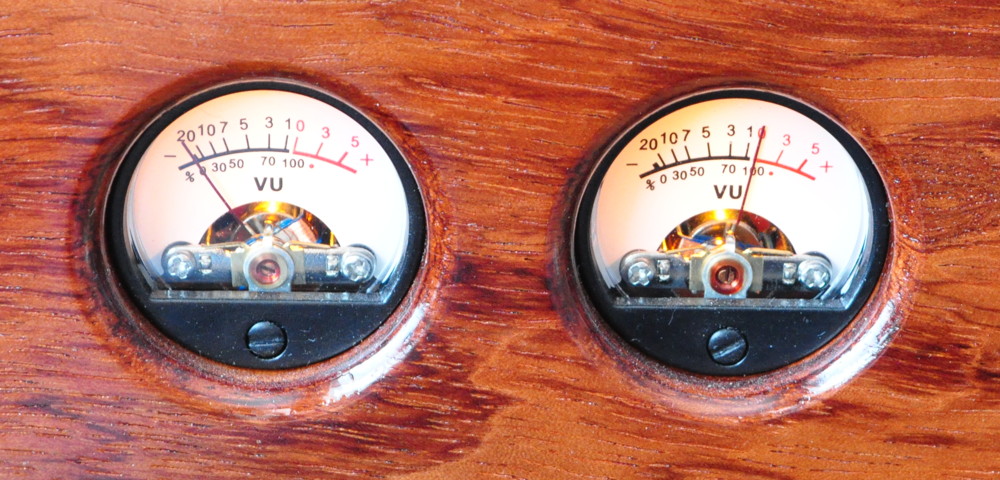
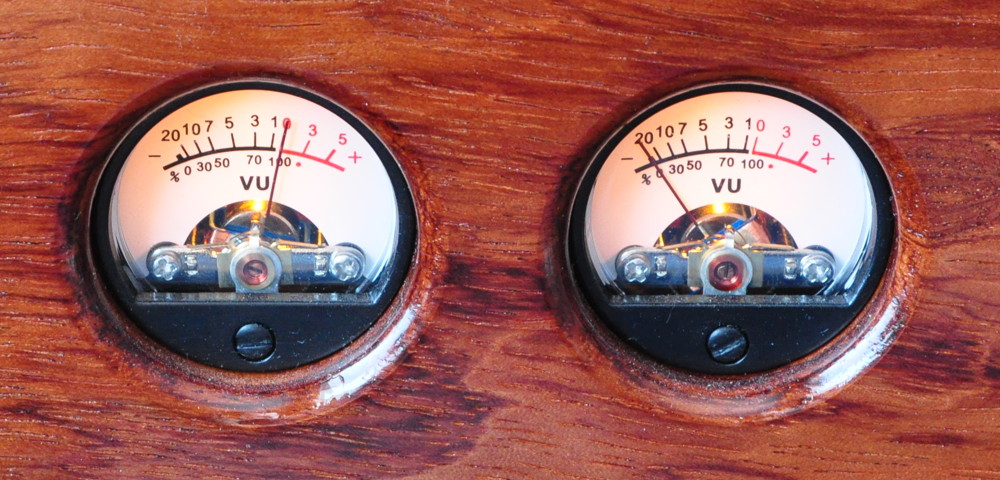
After assembly was complete, I decided to get the VU meters properly calibrated. I did this in the same manner I used for The “Purpleheart” Signal Meters. There was one thing which was a little different. Because this was solely to calibrate the meters, I decided to feed the calibration signal into the output jacks. Technically I was back feeding the buffer circuit through the output coupling caps, but this really isn’t an issue for the meters as they are direct connected to the output and my signal source could easily handle the additional load. I don’t have a picture of my entire test setup but here is the calibration signal and the calibrated meters.
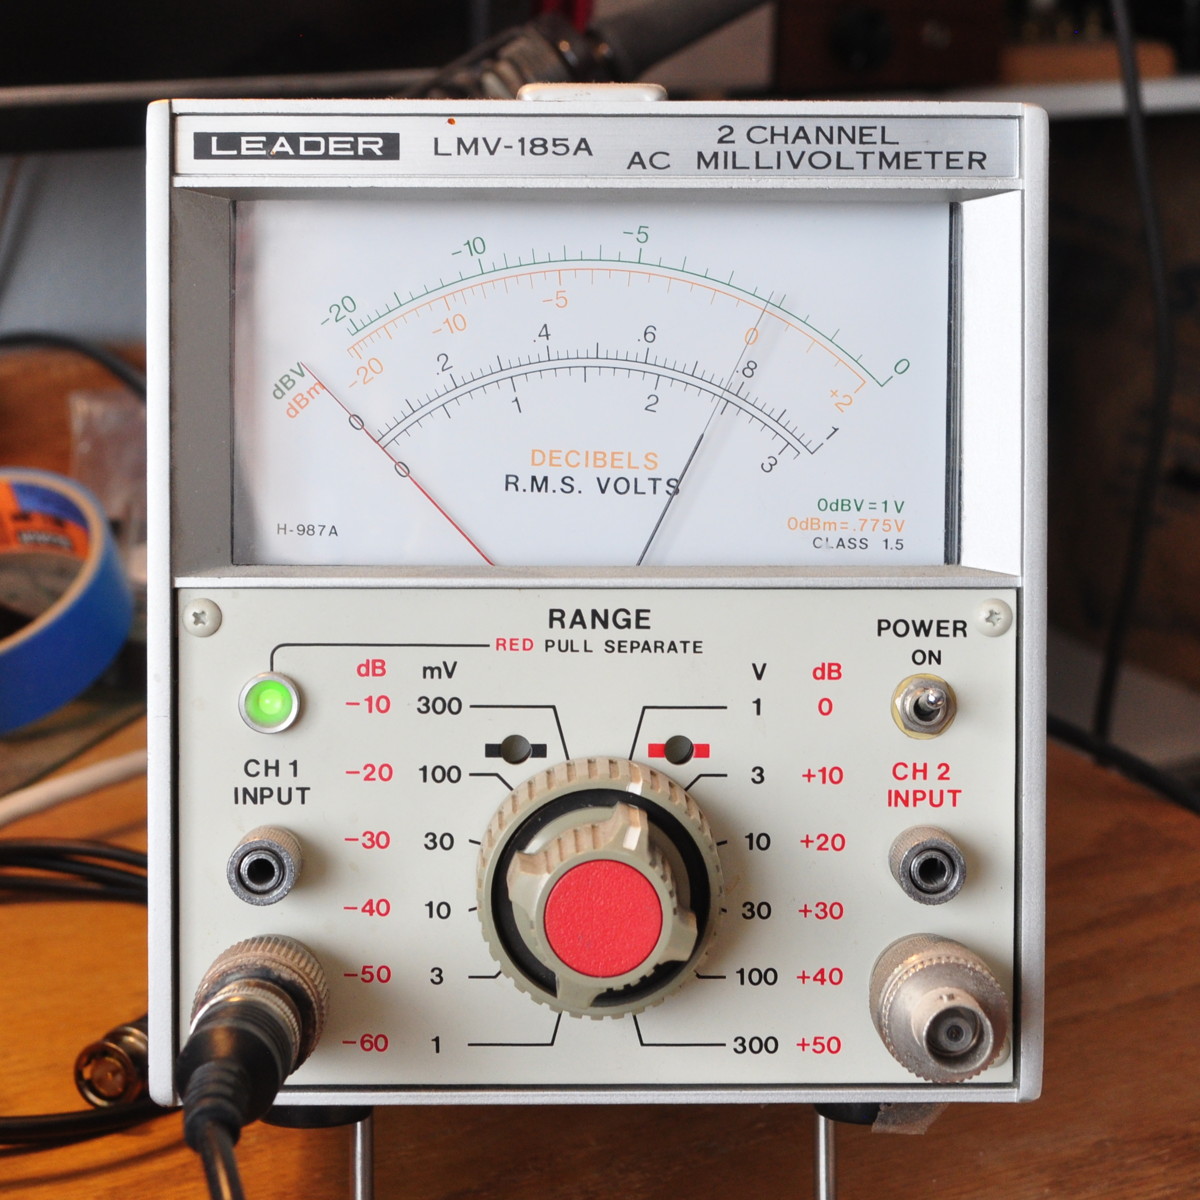
This shows the calibration voltage is set to 0.775v RMS or 0dBu. And here are the calibrated VU meters (right and left).
Once the assembly and calibration were complete, it was time to do some performance testing. But before I started taking measurements, I connected the unit to an amplifier and plugged in an iPod. I’m happy to report it’s dead quiet with no signal, and it sounds really good.
Here are the gain and bandwidth plots from the performance testing.
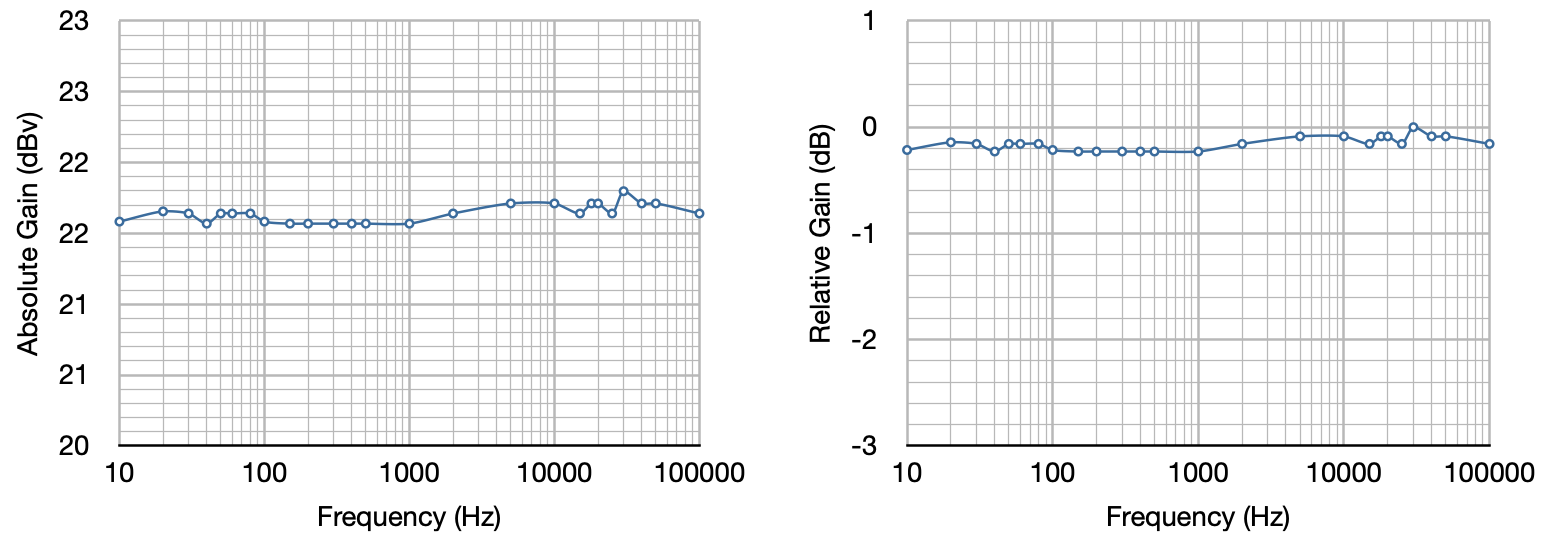
Note that this is the total gain available from the circuit. With the volume control set midway (i.e. at the 12 o’clock position) the end to end gain is close to unity. It also demonstrates that there is lots of control range to adjust line levels as required when changing inputs. The gain variation is less than a quarter dB from 10Hz all the way to 100kHz. This is as designed so that the unit does not contribute to bandpass roll off at either end of the musical spectrum.
It will probably take a while before I get the project page for this project posted. And I’ll have all the performance data to share at that time. However as of today, the Source Selector Unit project is complete and operating properly.
As always, questions and comments are welcome.
Very much enjoyed watching this project come together. I came back to it today so as to read through again. I probably won’t build it as all my equipment has outputs that are too high for my amp (Lacewood 6V6).
Do you have any photos of it sitting in its final resting place? I seem to recall you saying it would sit under your CD player.
Do you have any thoughts on what your next project might be?
Would you believe that it’s still not in place? I’ve been remarkably busy in the last month hence the lack of blog updates. I’m going to try and get the project page for this unit uploaded soon.
My next project will likely be a super simple amp switch just so that I can go between my amplifier and my headphone amp. I’ve been using my headphone amp in my office recently and the whole switching cables thing is a pain.
I promise, I’ll get back to posting soon. 🙂
I see some interesting new construction techniques. Looking forward to the full write-up. As always, thanks for posting your projects.
Thanks Matt:
Another great write up and build. I love it. I look forward to reading the consolidated version with more pictures and data.
Thanks again for the inspiration to build
It is wonderful final look of assembly and happy to hear about the result. just quick question about tube horizontal position. Does it affect tube life time due to heat compensation comparing to vertical position?
Most receiving type tubes can be mounted in any orientation without ill effects. There are the occasional large power tubes that have orientation restrictions but most do not. If they have restrictions, it is usually noted in the tube data sheet.
It’s important to remember that inside the vacuum tube, all heat transmission is via infrared radiation because there is no gas inside the tube. So the rules of convection do not apply inside the glass envelope.