
I’m working on two projects simultaneously right now; the 6AS7 SET and the Triode Test Jig. In the last couple of days I’ve made progress on both. However now I appear to be at an impasse.
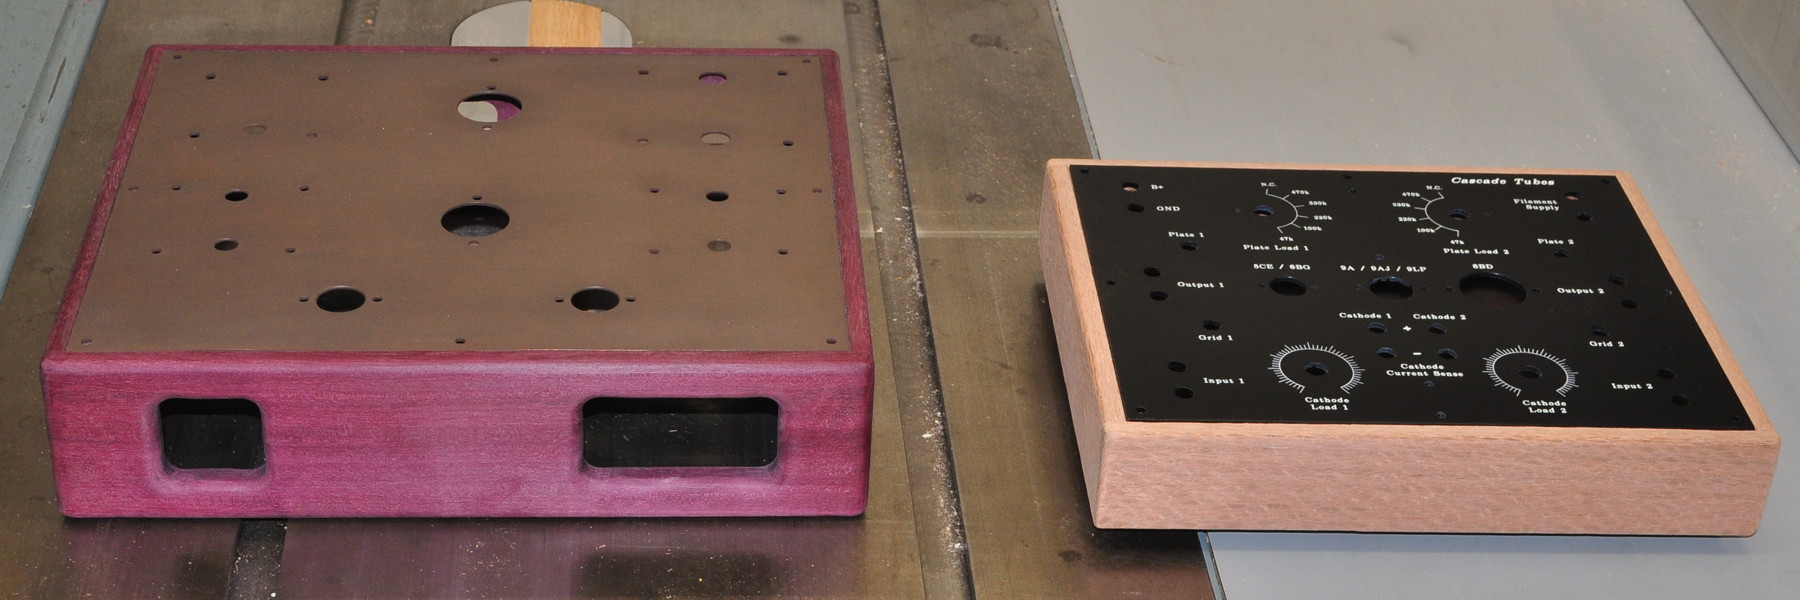
First, here is where I am at the moment. Both wood chassis are fine sanded and ready for the final oil finish. All the pieces of metal are either fully treated (for the copper) or ready for primer and paint.
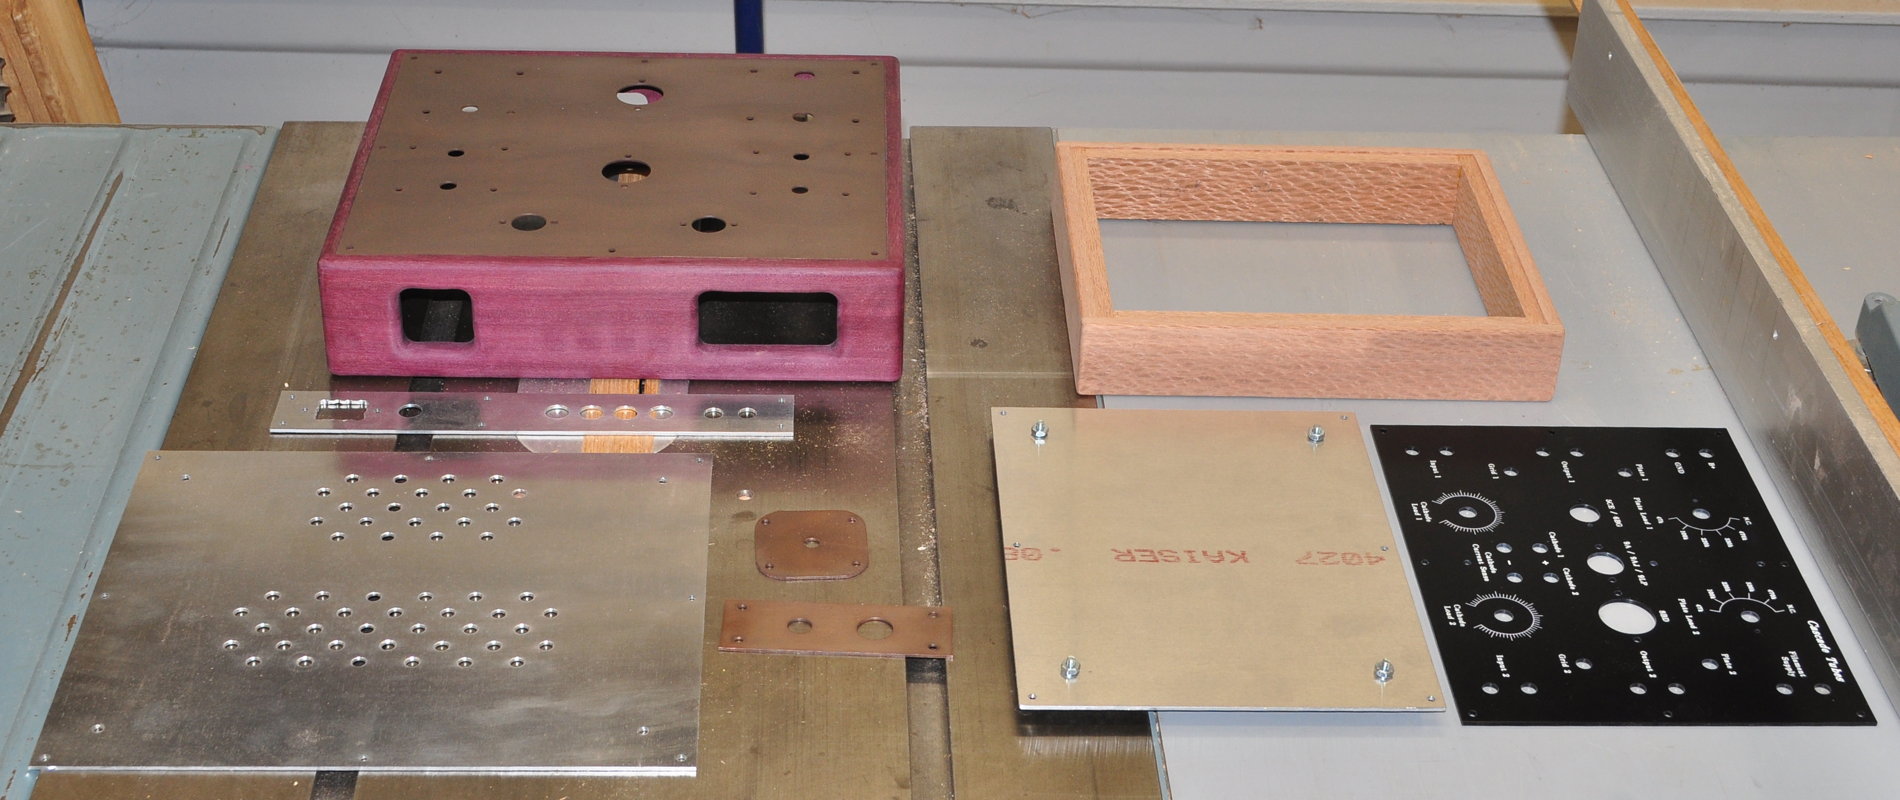
Normally this is the point where I do the final finishing and painting so I can start assembly. Unfortunately my oil finish and paint both need at least 60°F (≈15°C) to set and dry and this is something I simply can’t do in the house due to the fumes and smell. Right now, even with both my heaters running, my workshop is hovering between 50°F and 55°F (10°C & 13°C). It’s just not warm enough to start this process.
I could begin partial assembly, but I am hesitant to start this on the amp because assembly is intertwined with the chassis due to the multiple pieces of metal and mechanical pieces required. The test jig is actually much simpler because everything is mounted to the top plate which is complete. This is an assembly method shared with my Universal Preamp build. I could actually complete the test jig build and simply not finish the wood until i get the weather for it.
I realize that most readers are probably getting a little impatient to see some amp assembly. This SET project has be dragging along for a while now. But I think I’m going to get going on the test jig for now. I’ll just have wait for the opportunity to do some finishing.
Don’t worry, both of these projects will get completed soon.
As always, questions and comments are welcome.
Very nice work and good progress on both projects. It is enviable to have 2 diy projects going at one time!
A query regarding vent location, is there any need for venting of the top cover as you have done for the base, or are there enough heat escape routes through existing openings?
There’s actually very little heat build up inside the chassis. Convection through the lower venting along with conductive cooling via the metal top plate is more than sufficient.
I’d build the test jig first, since it can be completely wired on the top plate and checked out. Then mount the devices on the top plate of the amp and maybe get some parts of the wiring done. After that you will need to pray for warmer weather.
Side note – here in eastern Pennsylvania, we are supposed to get hammered with snow this weekend, I hope it isn’t too bad.
Hello,
Your various elements look classy & the finishes are very professional. How did you print the test jig top plate ? Was it silk screen ?
The top plarte for the test jig was professionally made by a company called Front Panel Express. I talked about it in the post titled The Indulgence.
The letters and markings are actually engraved into the metal and then filled with ink. I could never have accomplished this level of quality and polish myself.
Hello again,
Yes I saw the first post “The indulgence” today… For some reason these earlier posts did not appear when I browsed through the blog a few days ago ??
Anyway, the etching (or engraving) looks really good. So far I have found (in Thailand) an artisan who will laser cut the chassis, but I do not have anyone to do this type of etching yet. I will keep looking .
Christophe