
Today I was once again reminded of the perilous state of human fallibility and the risks of personal hubris. The cost of today’s lesson? One ruined KT-88. And a little smoke in the office.
A couple of days ago, in a reply to a comment, I said I was hoping to design the upcoming 6L6 SE-UL amplifier with the ability to handle KT-88/6550 tubes without any circuit changes. Since I already selected the B+ voltage and the cathode bias resistor value for the 6L6, I needed to check the bias condition of the KT-88 under the same conditions. This was the task for this afternoon. I had a nice pair of KT-88 on the parts shelf so I went to work.
When I performed the 6L6 SE-UL Optimization Study, I built myself a jig to simplify the process and to let me test these power tubes under better (and safer) conditions. I talked about the jig in the UL Optimization Revisited post. Here is the jig I built.

I want to draw your attention to two details. First; nothing on this jig is labeled. Second; be aware of the red and black binding posts in the upper left hand corner. These particular posts are the grid circuit input for the tube.
I’ve used this jig to good effect many times since I built it. This afternoon I grabbed one of my KT-88s, wired in the appropriate output transformer, inserted the 470Ω cathode bias resistor and a 470µf bypass capacitor. With everything in the circuit set, I wired up the high voltage and filament supplies and powered up the IP-17 High voltage supply. The tube filament started to come up to temperature and I gave the tube a couple of minutes to stabilize before applying the B+.
With everything ready to go I flipped the toggle switch and enabled the high voltage. That’s when things went bad. FAST! Before I could even react, the current meter on the power supply pegged out at maximum and smoke started to come from under the tube. I immediately powered down the HV and filament supplies and surveyed the damage.
As I said, I’ve used the jig many time with no issues. And as I was sitting and staring at the setup I saw it. I couldn’t believe what I had done. And it was definitely my fault!
Instead of attaching the high voltage supply to the output transformer, I had done the unthinkable and applied 350vdc to the grid circuit of the KT-88. The poor tube never stood a chance. I have destroyed tubes in the past, but I don’t believe I’ve ever done it so quickly.
See I had just assumed that I knew what I was doing and properly remembered the setup of that particular jig. But I saw those red and black posts up in the corner and naturally, I plugged those red and black connections from the HV supply right into them. What I should have done was plugged the B+ lead into the red post in the upper right corner where the plate lead of the output transformer was connected. Then I should have plugged the return into the black post at the bottom of the jig.
Needless to say, with +350v on the grid input, the 1kΩ grid stopper in the jig was the source of the smoke. Here are the remains.
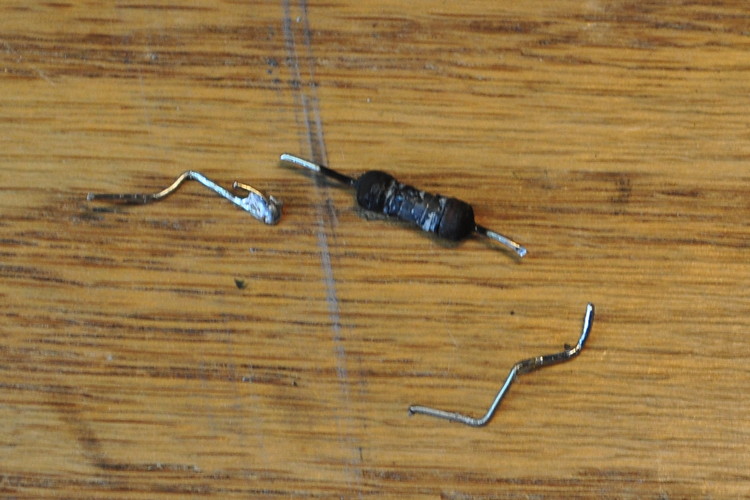
It’s actually amazing how much smoke can be generated by such a small component. But even without any other indications, I already knew that the KT-88 was no longer viable.
So I disconnected everything and went to work. First I replaced the grid stopper resistor in the jig. But I didn’t stop there. I had been led down the primrose path by that red binding post on the grid input. As such, before I went back to work I removed the red post and replaced it with a green one. In most of my jigs red and black are used for high voltage and ground respectively. I reserve other colors for intermediate voltages or signal connections. (I didn’t follow this on the Dual Triode Test Jig but there everything is labeled so it’s harder to get confused.)
Here are the connections on my second attempt after fixing the jig and grabbing my other KT-88 off the parts shelf.
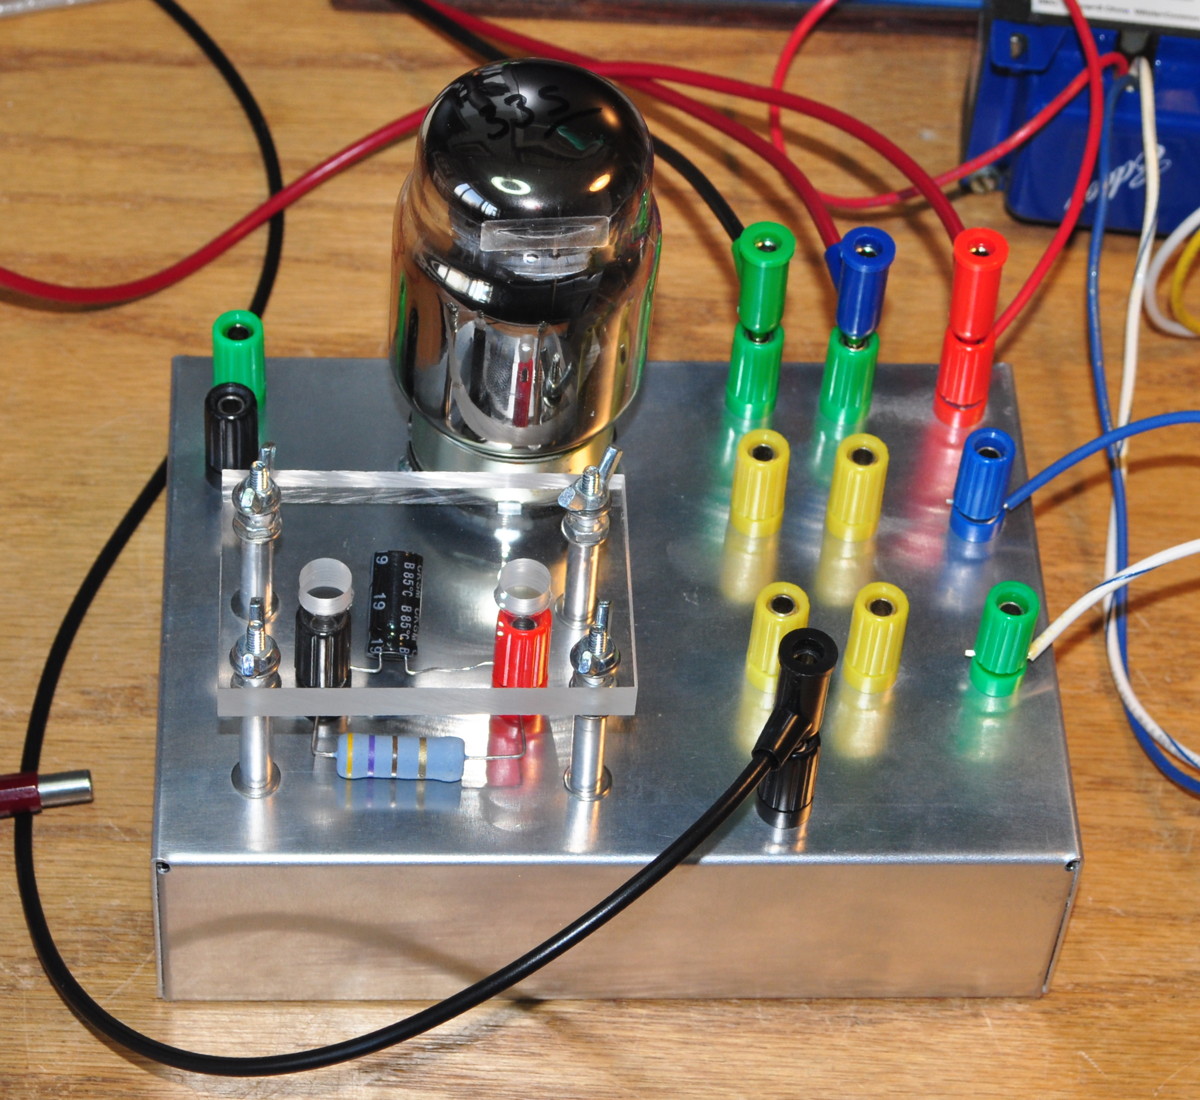
Notice the green binding post in the upper left corner where it was red before. Also notice the red B+ lead in the upper right corner and the return in the black post at the bottom. These are the correct connections for this jig. Now when I finally powered up the test setup, all went as planned. Here is the second KT-88 with 400v applied to the transformer and comfortably drawing about 76mA of total current.
It appears that the KT-88 should operate fine at the circuit conditions chosen for the 6L6.
There are lots of lessons here. Check your setups carefully. Label your jigs. Don’t get too comfortable around the test bench. And most importantly, don’t become so negligent as to assume that you don’t need to double and triple check your work. Today that attitude cost me a relatively expensive power tube.
As always, questions and comments are welcome.
Pingback: Old Dog, New Tricks | Cascade Tubes
I label all my jigs and fixtures. Woodworking stuff gets a lot of sharpie (permanent marker pen). With the electronics stuff, it seems to be a lot of masking tape labels. Not the most permanent nor elegant, but we’ve all learned the hard way to minimize errors however you can. Sorry about that KT88.
Is that a Heathkit power supply?
I may be getting a lot better about labeling things from now on.
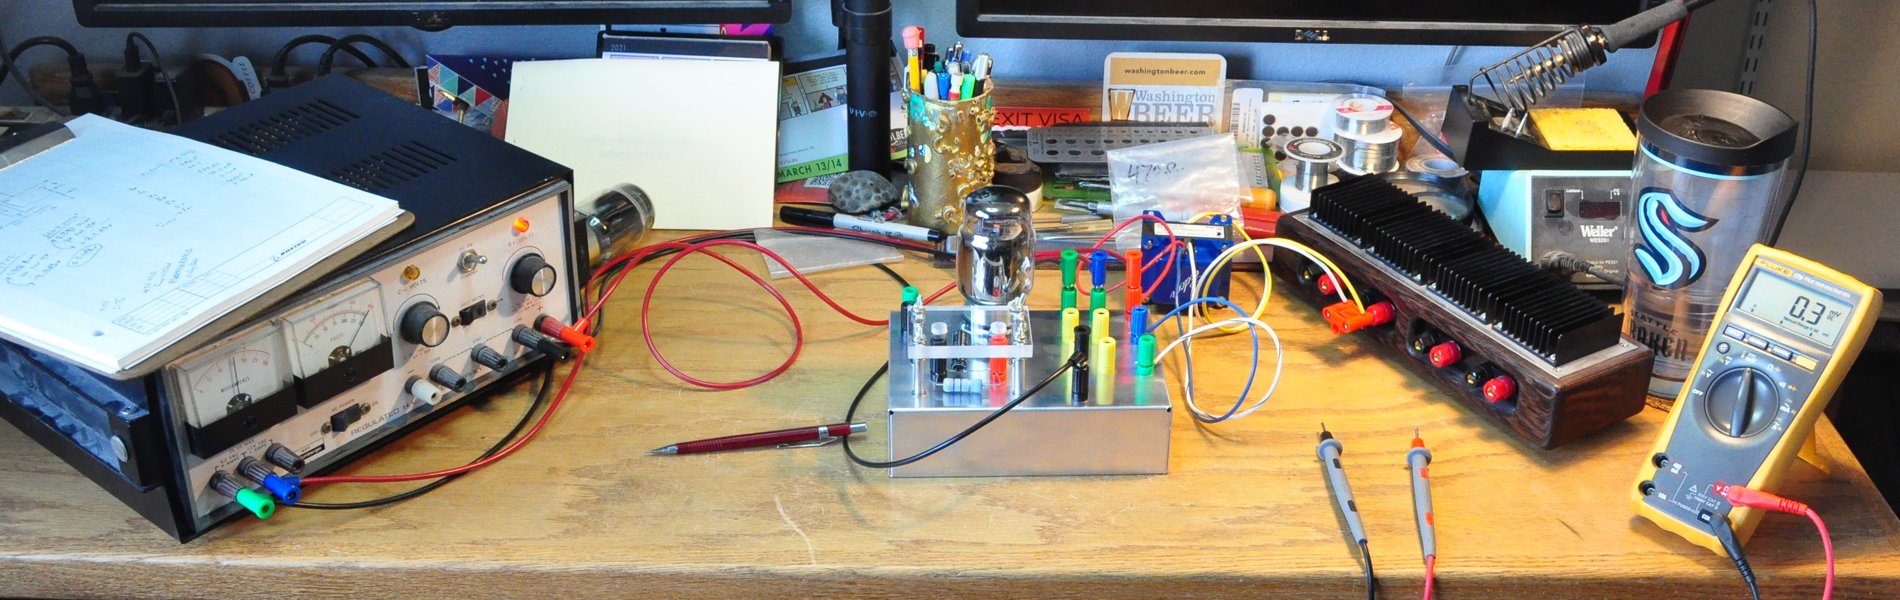
Yes my HV power supply is an old HeathKit IP-17. It’s a unit I got refurbished for a good deal back in 2014. These power supplies are great and so long as the main transformer is still good (most are as they have very few hours on them) then there is nothing which can’t easily be fixed or rebuilt. I would recommend this power supply to anyone that does a lot of tinkering with tubes.
Happens to us all. Many years ago I accidentally connected a 230V 3kW servo amplifier to a 480 volt power source. Flipped the breaker on – BANG over $1000 dollars worth of “magic smoke” was released. Moral of the story – don’t rush and triple check everything.