
After many delays and distractions I have finally finished the 6AS7 SET chassis and have begun assembly.
The gloss finish on the chassis has been toned down to a more hand-rubbed look and I have just begun mounting components. I haven’t started with the top plate yet. However all the jacks, controls, etc. have been mounted to the front and back plates and those have been mounted in the chassis. Here’s the front view which should give some hints as to how the final amp will look.
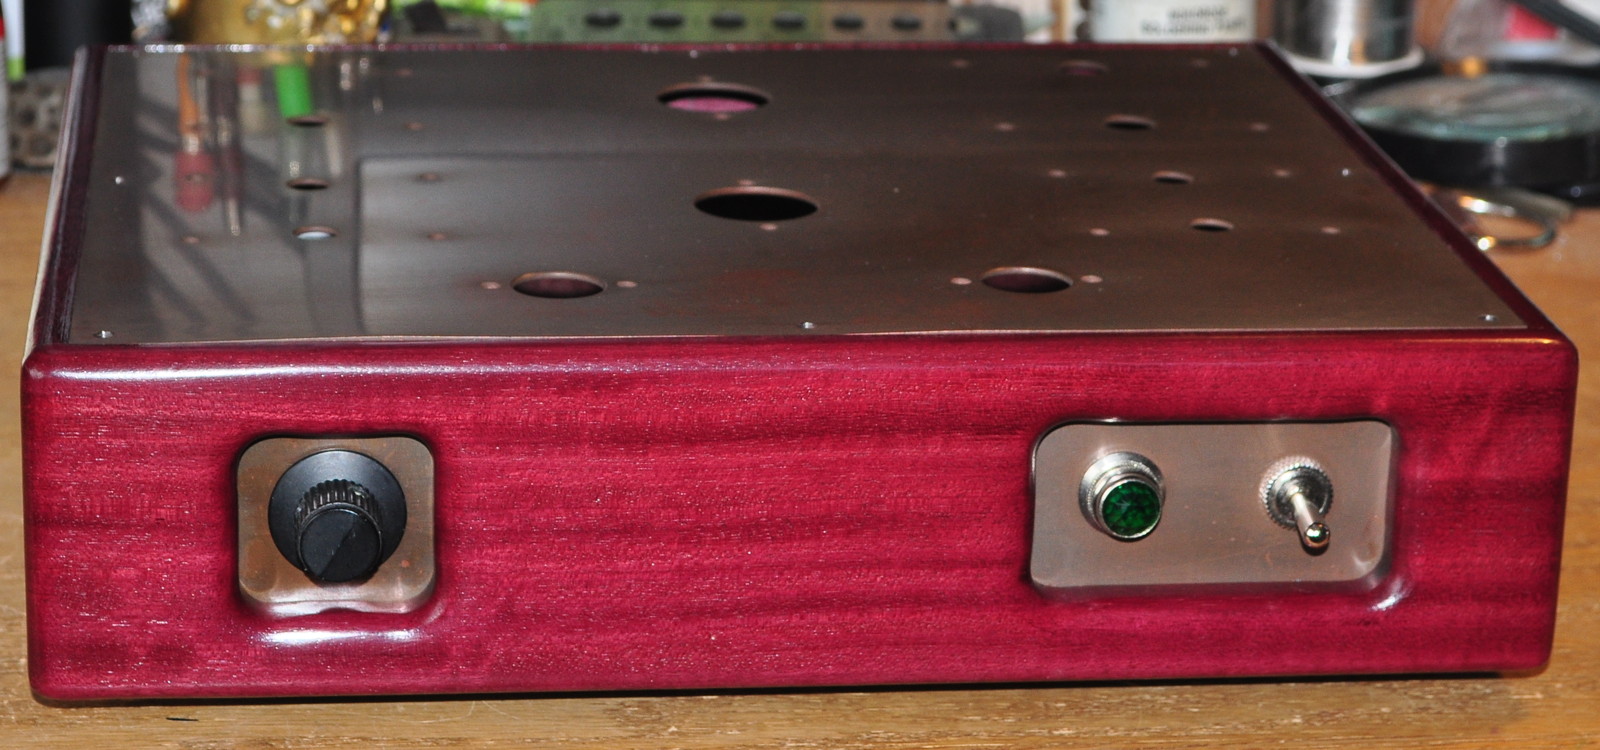
This photo really doesn’t do the combination of aged copper and purple heart due justice. Unfortunately the weather has been such that I haven’t yet had the opportunity to take a picture under natural light.
Here’s a look at the minimal internals so far.
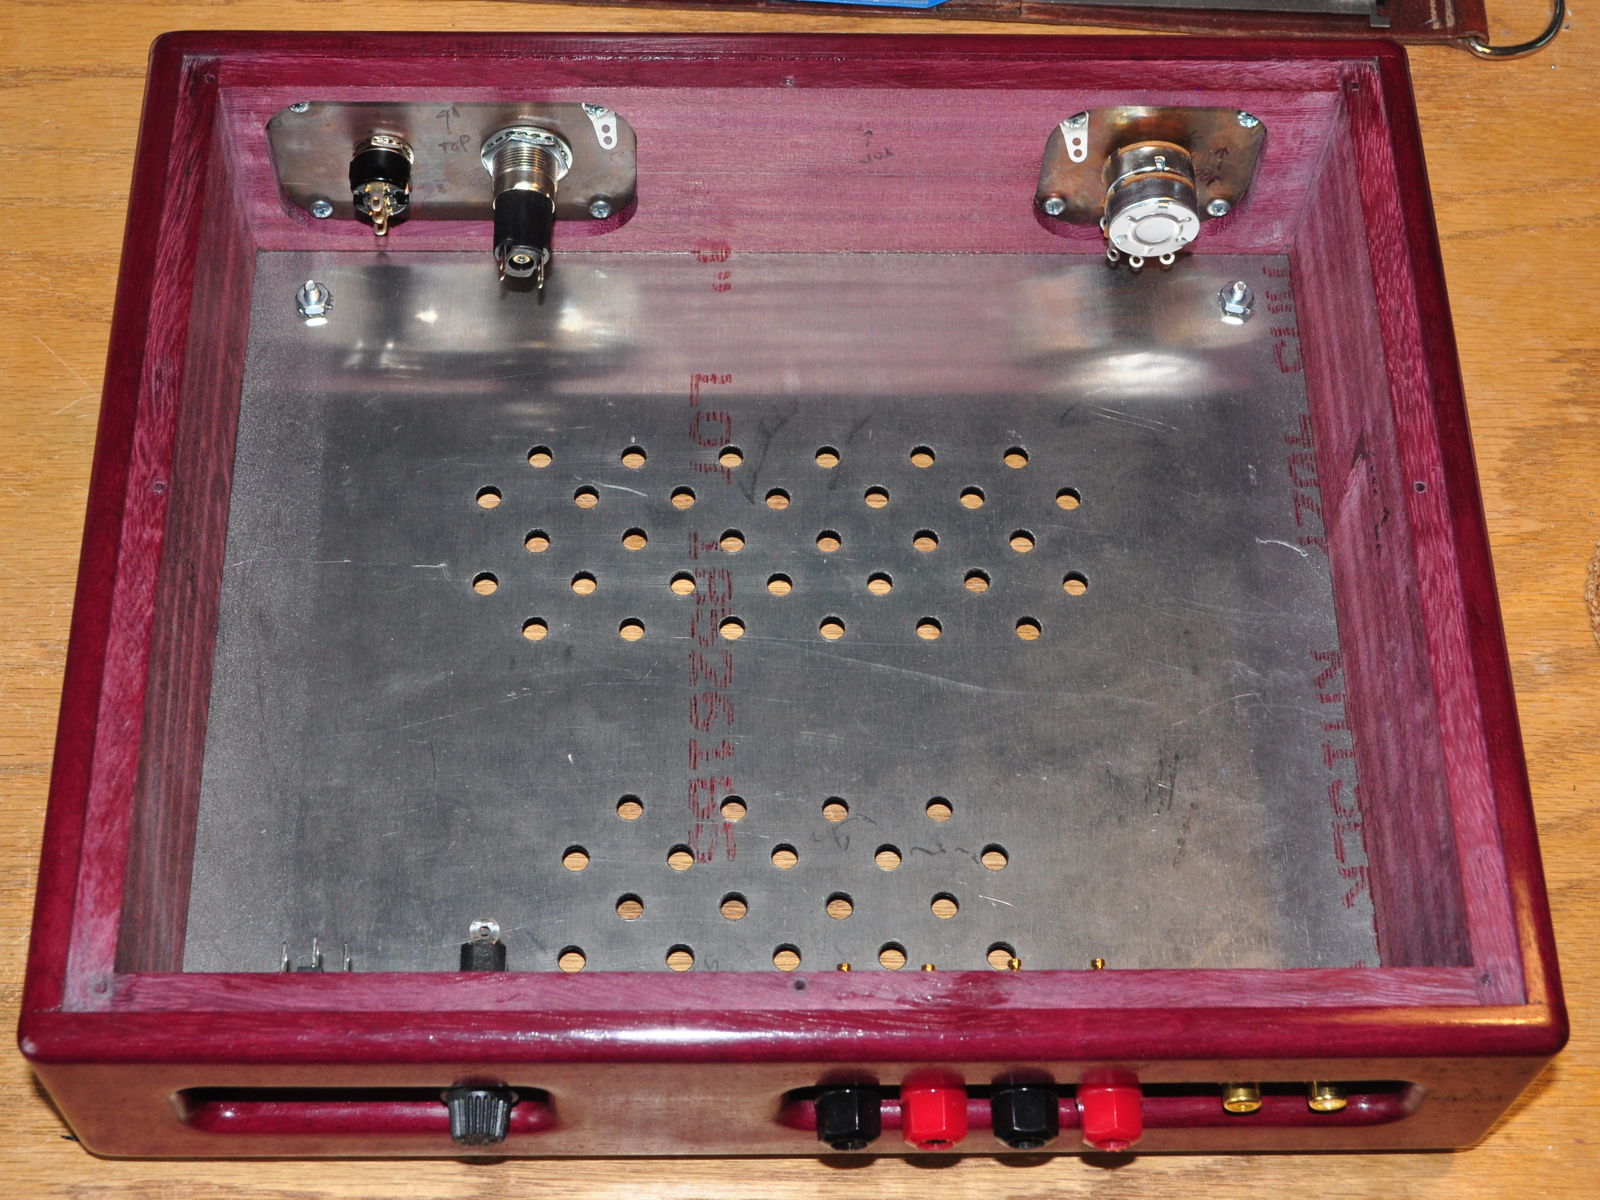
In the back there are two cutouts. On the right in this picture are the speaker terminals and the two input jacks. On the left are the power cord jack and the fuse holder. Up front, the power switch, indicator lamp holder, and the volume control are clearly visible. Also I’ve included some ventilation holes in the bottom plate.
I will begin to mount the various parts and iron on the top plate. Once that’s done, I’ll begin wiring the ring frame chassis. In addition to things like power switch and signal wiring, there are two Hammond 154M 2H, 100mA chokes that need to be mounted on the inside sides of the chassis. These are part of the split power supply filter between the power stages. This filter puts over 80dB of power supply isolation (at 120Hz) between the power stages. Once again I am designing for very high channel isolation to get a very wide and deep soundstage.
I don’t know how long it will take to get everything mounted as I’ve got some other things demanding my attention at the moment. But as soon as everything is mounted I’ll post more pictures.
And On Another Front…
Look at what arrived yesterday.
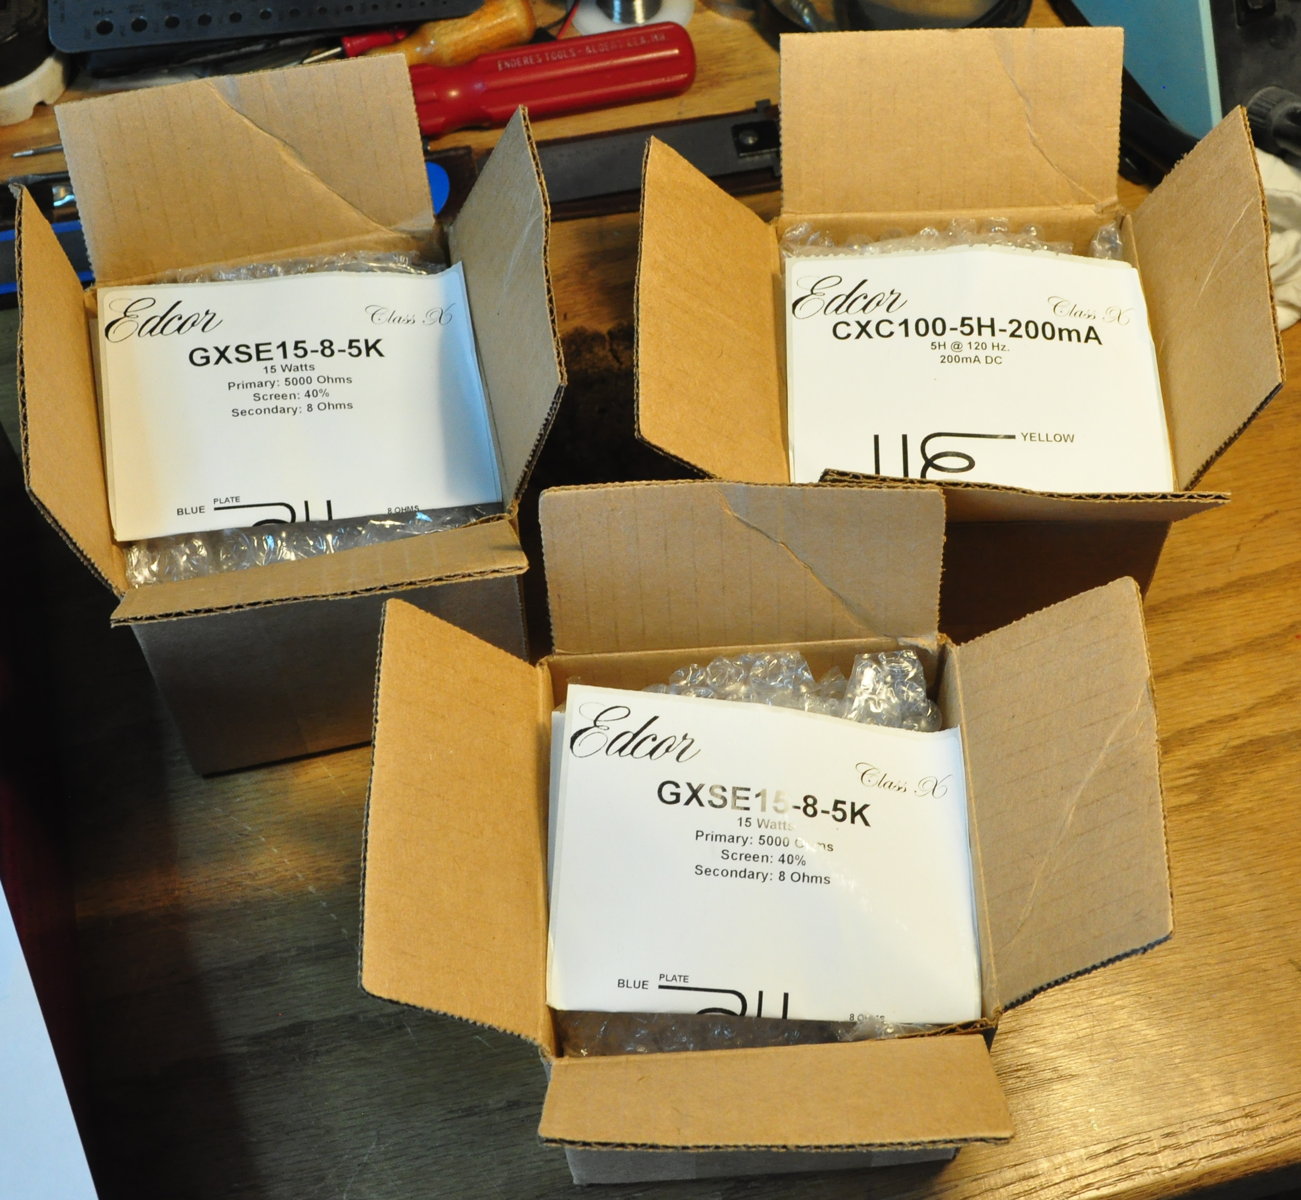
This is the output transformers and the main filter choke for the 6L6 SE-UL amplifier I discussed previously. This order was placed with Edcor on March 29th and it arrived at my doorstep on April 11th; exactly 14 days from order to delivery! This is the fastest I’ve every received an order from Edcor. I’m very pleased. This might be a great time to place an Edcor order if you’ve been considering getting some transformers.
Now it’s time for me to get back to work.
As always, questions and comments are welcome.
Pingback: Switching Gears is Hard on the Clutch | Cascade Tubes
I noticed the ground lugs on each of the panels. That’s a good practice that I have neglected to follow.
I’m curious where you get sheet metal for your chassis’s. Also curious if front/back panels are same thickness as top plate. Bottom too?
Apologies if you’ve already told us about those in an earlier post.
The ground lugs allow me to achieve a good earth ground for all exposed metal parts. these are all grounded directly to the Earth ground. This is a good safety practice.
All the aluminum I use is 80mil (0.08″, 2mm) T6061-T6. I buy this from a local supplier in 2’x4′ (61cm x 122cm) sheets. These are small enough for me to size to final shape on my metal cutting saw. The copper for this project is 65mil (0.065″, 1.7mm) 110 copper sheet. This was purchased from Online Metals in 12″x12″ (30cm x 30cm) sheets.
Actually, bonding of all accessible metal parts to the equipment grounding conductor is a UL requirement.
Technically correct. However, as I don’t submit my design drawings for listing with Underwriters Laboratories, I prefer to focus on the practice as good safety design rather than codified requirements.
I’m planning on building the 6L6GC SE as well, when you present the design, so I ordered the Edcor transformers (power and output) on March 1, and they arrived on April 2 – just about 4 weeks, which was great. Back to the times before pre-pandemic / supply chain issues that have plagued so many businesses. But 14 days is truly amazing!
That is the fastest I have ever heard of an Edcor order coming. I am glad because I am exited to see the schematic for the 6L6 build.
On December 21 you talked about buying a top from Front Panel Express for the SET. Did you decide just to go with a plain copper patina plate?
I went with the copper. It has aged nicely and picked up some other discolorations that add to the effect of aging. In combination with the hand rubbed look of the wood finish it really does look like it’s been around for quite a while.