
I often get questions about how I design and construct my projects. One of the things I realized this morning, after receiving such a question, was that I really haven’t addressed my basic metal work and how I size all the aluminum parts I use for my chassis. So I thought I’d give a little insight into how I make these cuts and how I got to where I am today.
The first thing I should say is that my current process for working with sheet aluminum has evolved over the last 15 years or so. When I started out things were much more manual. Here is my first solution to cutting sheet aluminum pieces to size.
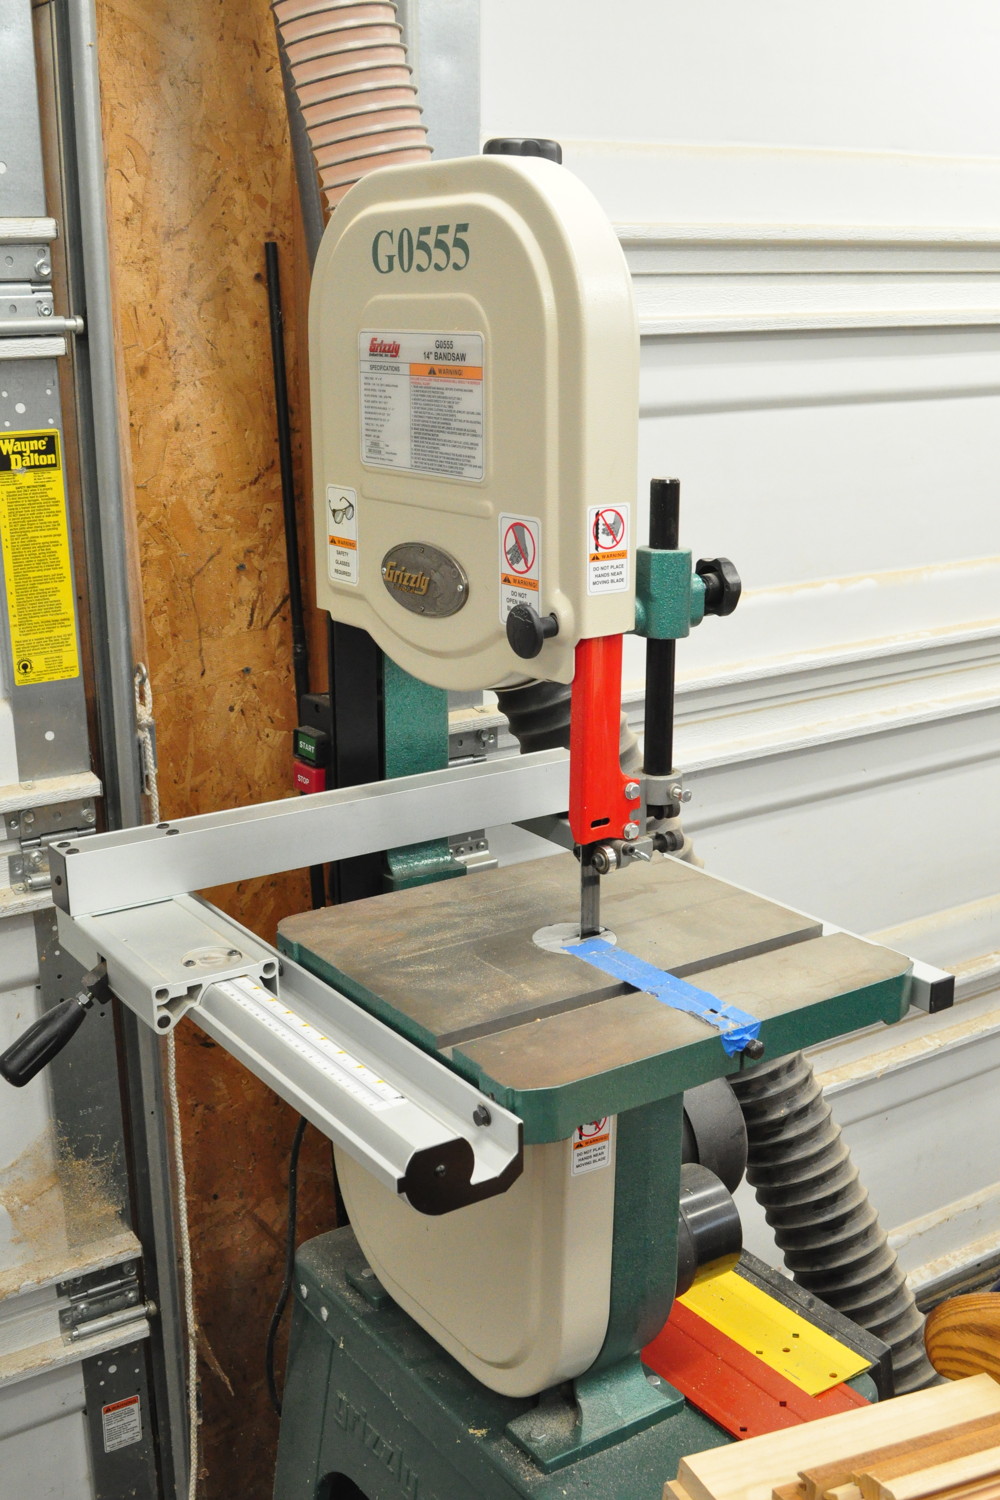
This is just a typical 14″ woodworking bandsaw with a fine tooth metal cutting blade installed. This was my solution for several years as I started building tube projects. This approach had two major drawbacks.
The first was the roughness of the cuts. The cuts with the metal blade were far from smooth or perfectly straight. So each piece had to be cut slightly oversized by maybe 1/16″ to 1/8″ (1.6mm to 3.2mm) and then carefully filed to the marked layout lines with a large mill file. Needless to say this was a time consuming process. In addition, every time I needed to do some metal cutting, the wood cutting blade that was normally in the saw had to be changed out. Then the belts needed to be reset to change the saw speed and the whole setup tuned for proper tracking with the different blade. Then when complete it all had to be changed back.
The other issue with using the bandsaw was the limited throat depth on the saw. This limitation sometimes forced me into interesting compromises when looking for larger pieces of metal for projects. And when cutting a larger piece of sheet metal, the limited support afforded by the small table could also be an issue.
All that being said, I successfully used this saw for all my projects for several years. It was far from ideal, but the entire process was manageable, albeit a little slow. Then about ten years ago I stumbled onto a much better solution.
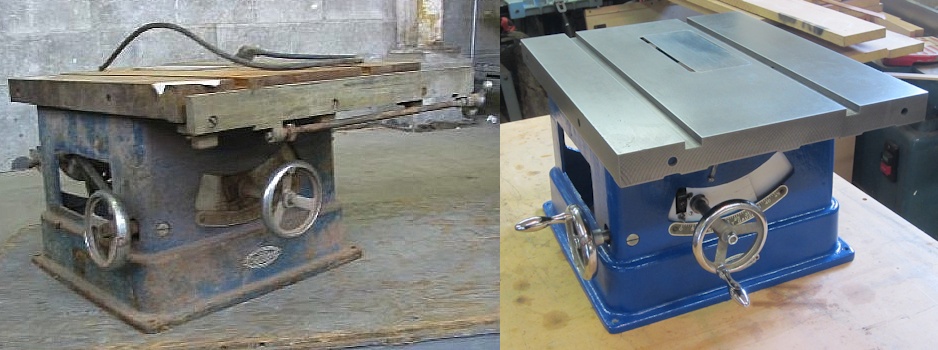
At a local salvage retailer I stumbled onto what I thought was a real find. It was an old Craftsman brand table saw from 1937. This was a Craftsman branded table saw model 101.02140 manufactured by Atlas Tool in Kalamazoo, Michigan, USA. This saw was a testament to the functional beauty of well made cast iron tools. And, much to my surprise, the attached motor ran when I plugged it in before I bought it. So I paid the princely fee of $35 and took it back to my shop where it underwent a complete restoration. Here is the before and after showing how it looked when I bought it verses after being restored.
Once restored, I built a nice rolling stand for the saw with a couple of drawers for storage and I installed a good quality, carbide tipped non-ferrous metal cutting blade in the saw. This is how it looks.
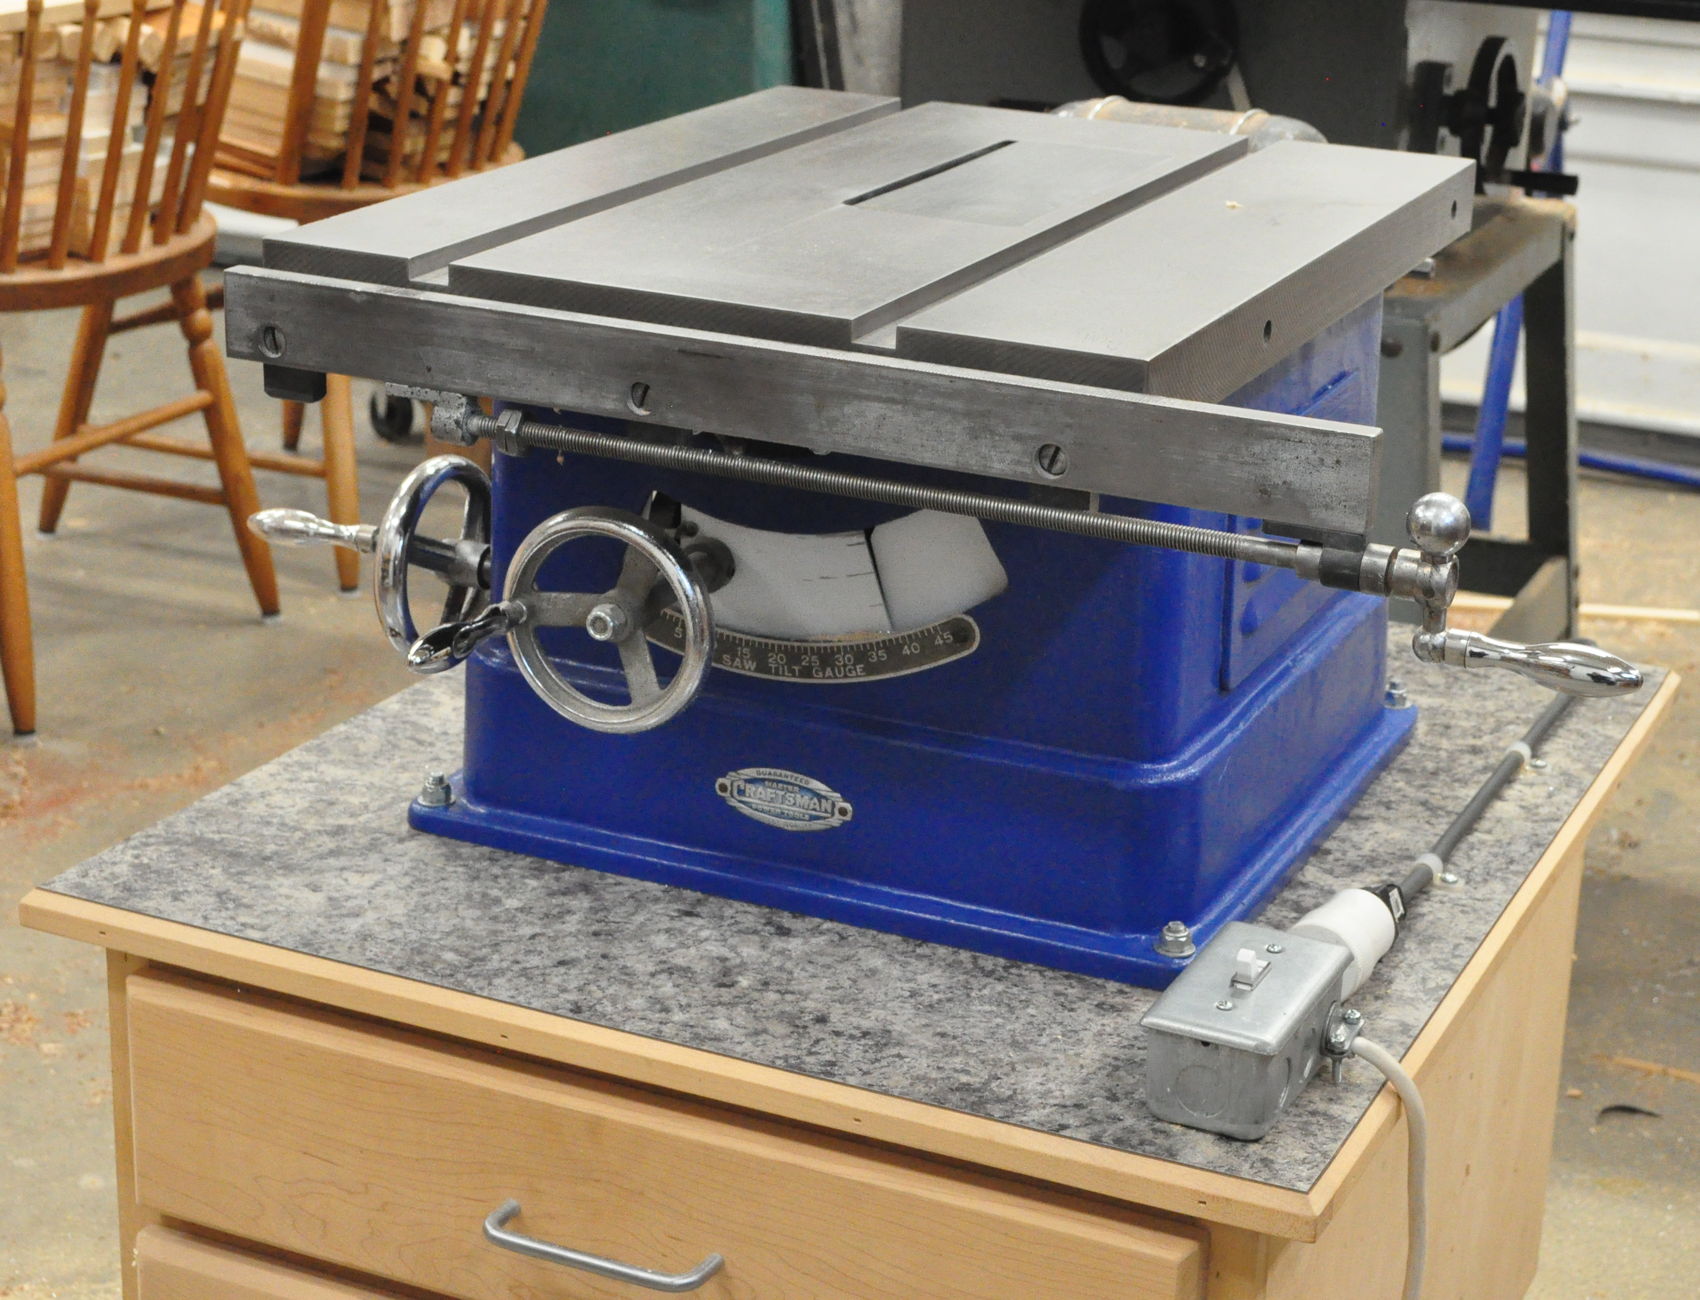
The other nice thing about this solution was that I built the cabinet height specifically so that, when not in use, I could simply roll the saw back under the extension table of my main shop table saw where it would be out of the way.

So this was my basic solution to cutting sheet aluminum for a while. I generally used a sliding miter gauge to hold the metal as I ran it across the blade. This worked okay, but it was also a little nerve racking. There was always the sinking feeling that at some point the blade was going to pick up a piece of metal and fling it back in my face. So I added an important addition. I built a sliding table for the saw.
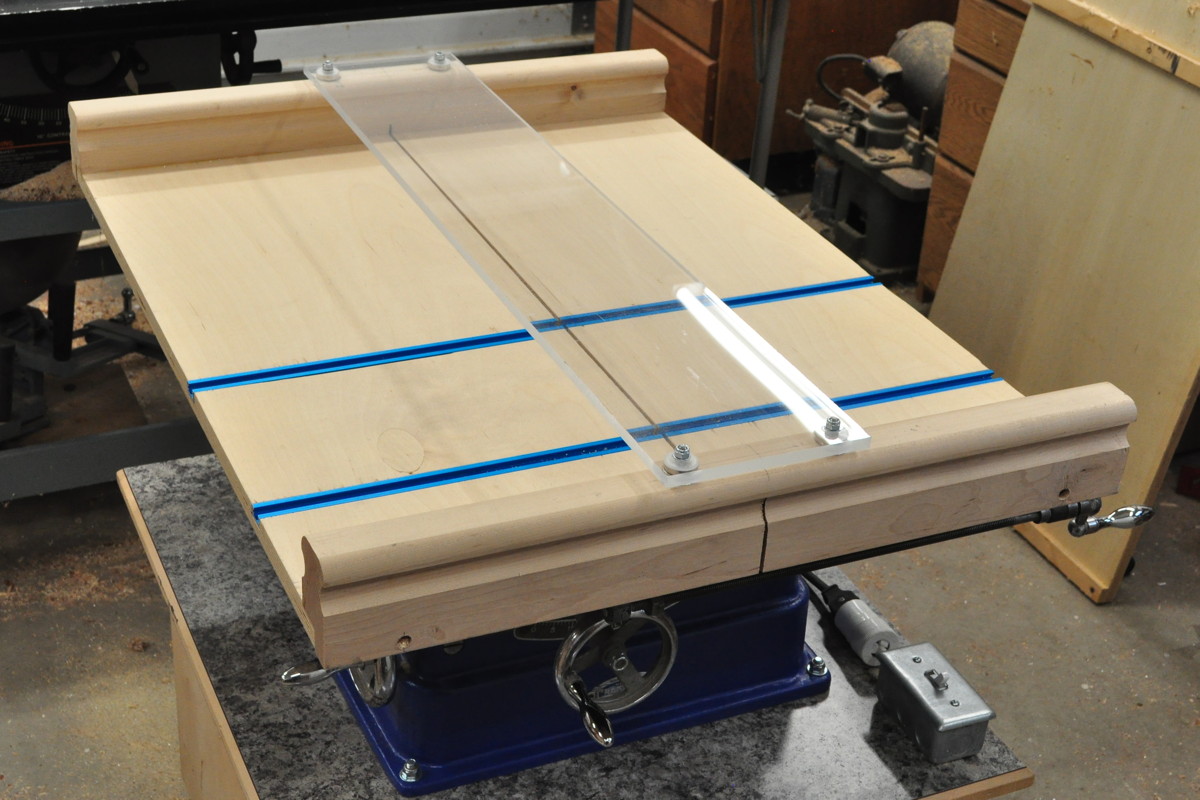
This table has a runner on the back that fits in the miter gauge slot. This allows it to slide fore and aft but not move at all side to side. It also has a couple of t-tracks allowing me to use hold downs to keep the metal being cut in position. And it has a nice thick polycarbonate guard held in place by some rare Earth magnets. This allows me to position metal for cutting, clamp it in position, and just drop the guard into position so no fragments or metal dust can fly directly back at me if something goes awry.
The front to back dimension on the table is 25″ (63.5cm) so I can safely cross cut the 24″ by 48″ (61cm by 122cm) sheets of aluminum I get from my metal supplier. This has now been my approach to cutting aluminum sheet for about 10 years. This approach yields very precise cuts and the carbide blade produces straight, smooth, sharp cornered edges. For smaller pieces of aluminum, I use clamps to hold everything in place prior to making a cut.
Here is a piece of marked aluminum all mounted on the table just before making a cut.
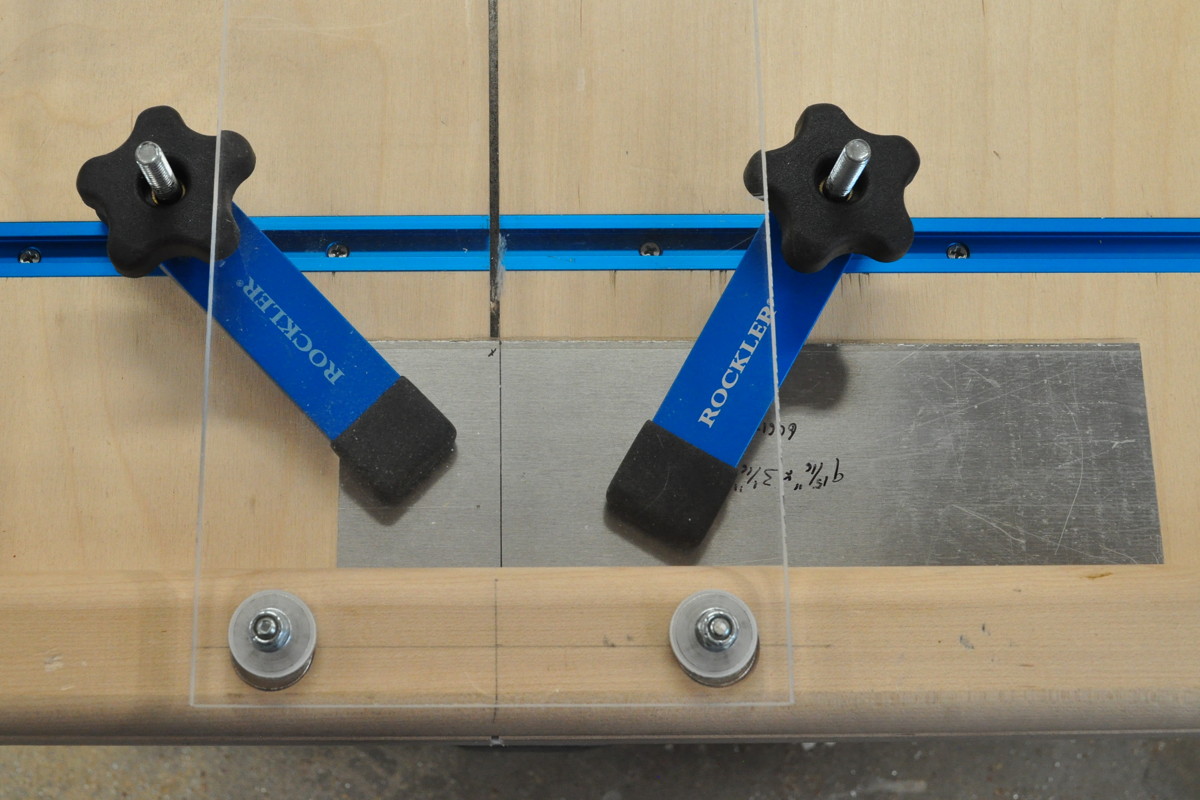
For square cuts, the metal is simply placed against the rear edge of the guide and clamped in place aligned with the saw cut. For angled cuts, the layout line is aligned with the saw kerf and the metal is clamped in position. This works really well.
Although not the fastest approach to cutting metal, this method has a couple of advantages. One is precision. It is easy to see where the cut will be and align the layout lines on the metal accordingly. It is also a simple matter to trim small amounts off of an existing piece to make a precision fit into a chassis opening. Once cut, any exposed sharp corners can be quickly broken with a single pass from a file.
So this is my approach for cutting sheet aluminum for amplifier projects. I don’t mean to suggest that this is the only way or the best way, it’s just my way. If you have other methods you use I would like to hear about them.
As always, questions and comments are welcome.
Thanks, I feel that whenever I ask a question you always give a substantial answer. I especially appreciate the photos. My routine is what you shared about cutting slightly bigger so that when the edges get sanded, the piece is the right size.