
As I mentioned back in June, I have been looking at different finishes for the copper portions of my 6AS7 SET amp. At that time I had mentioned that I was interested in a “patina” type finish for the copper. I learned that to many people copper patina means green tones, blue corrosion, and wild colors. I was looking for something more like a tarnished penny look. Something that would make the unit look more like an older piece of equipment. Unfortunately this was to be more involved than I first imagined.
If one logs on to the internet and searches “copper patina” the number of suggestions is staggering. When narrowed down to tarnish there are still a myriad of methods described; some slow and some fast, all messy.
I tried a lot of these methods. Some of the tarnishing ingredients included shellfish, eggs, baking soda, vinegar, lemon juice, salt, ammonia, and urine (I didn’t try this one). The results ranged from nothing to splotchy, to fair. Finally I settled on a technique using a photographic processing chemical called “rapid fix”. Having done black and white film processing in my youth, I was familiar with such chemicals and not intimidated by their use.
The rapid fix process produces a fine layer of oxidation on top of the copper. This is initially very soft and easily damaged. However, after a couple of days of oxidation, it becomes somewhat harder and can withstand light contact. This finish will definitely have to be clear coated when I get what I want. So here are some examples on pieces of scrap copper.
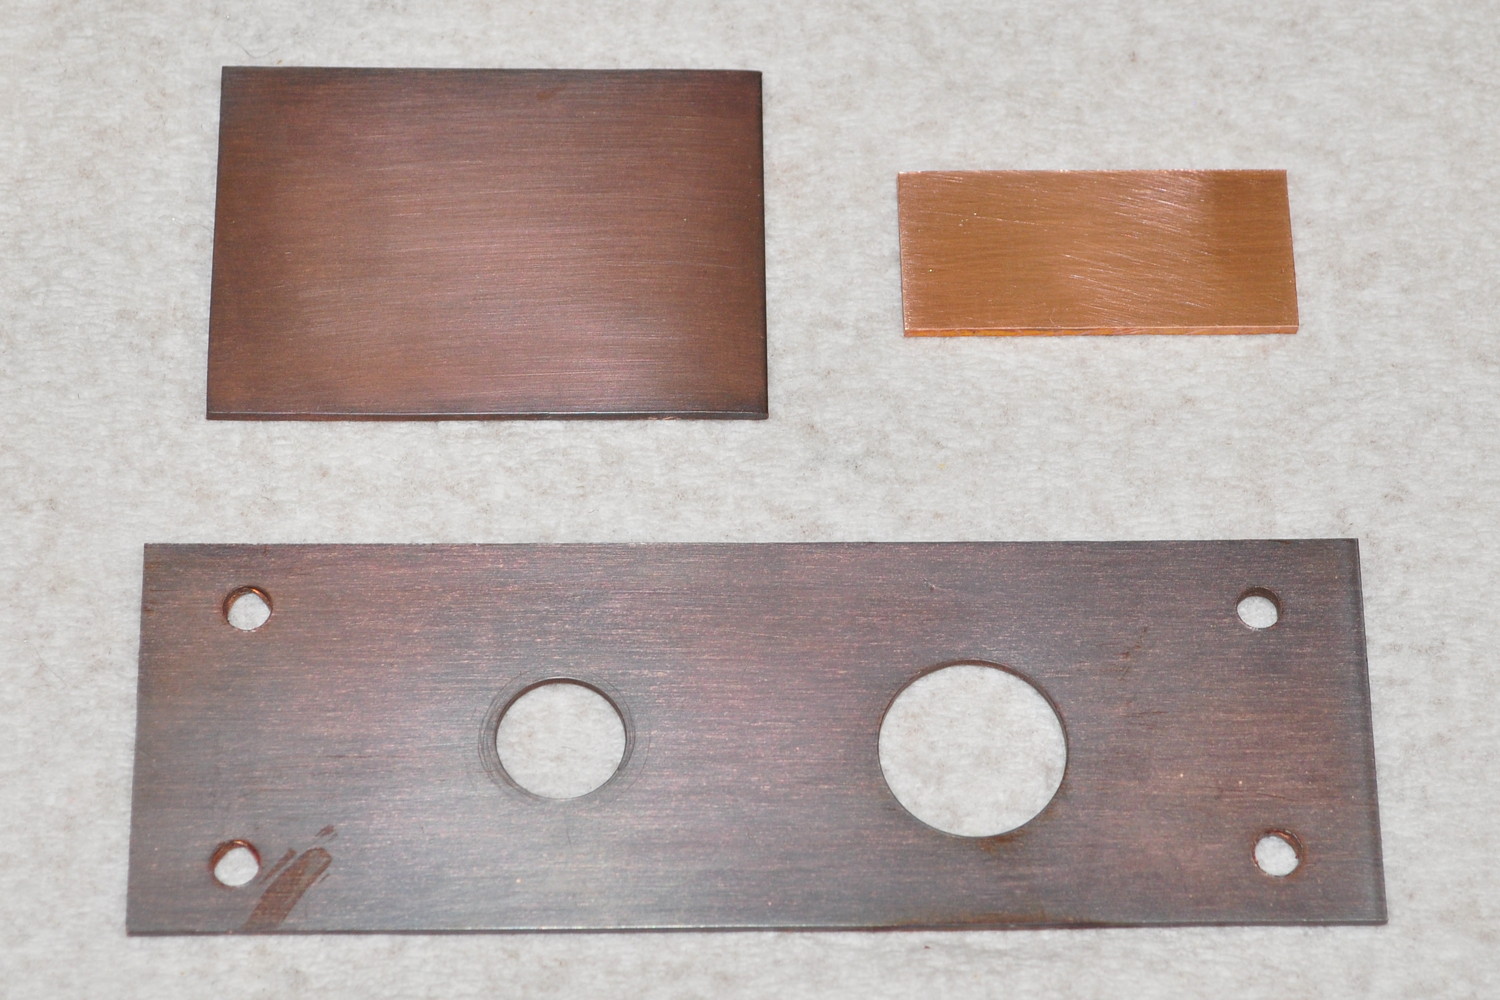
All these were buffed with steel wool to a high shine finish prior to starting. The upper right is an untreated sample for comparison. The upper left is a sample left in a 50/50 mixture of rapid fix and water for ten minutes, washed with warm water, gently dried, and allowed to oxidize in open air for a couple of hours. The lower sample was treated the same way except for being left in the solution for twenty minutes instead of ten. It’s hard to see in the photograph but the lower sample has a more purple overtone that’s actually a nice contrast to the purple heart.
At first I thought I’d hit the mark with the upper left sample. It has that “tarnished penny” look I imagined I wanted, and the tone will really complement the aging purple heart in a few years time. However, then a thought hit me and I tried an experiment. I decided to see if I could get a mottled “worn” look by working the finish. So I took a dry sponge and lightly buffed the lower piece. Here is the result.

At first I wasn’t pleased with the result. The fine scratches are from a synthetic scrubbing pad I tried first. But the more I look at this sample, the more I like the tone. It’s not as dark as the other, but it still has that “handled” copper look without being very dark. I think I’ll try another sample like this but be more careful with the dry sponge buffing.
So now I’m looking for some opinions. What do you think of the three different finishes and which one do you think will look best on the new amplifier? Please let me know as I continue my experiments.
I like the lower piece, if you can blend the lighter and darker shades without scratch lines. What about trying different timings with the chemicals on different areas of the copper. I’m stunned by the amount of time and effort you put into your projects, but it does pay off. How’s the house build going?
House building is going slowly. Being out for a month let the rainy season here really get rolling. That slows everything down.
Hello Matt,
To obtain the old penny look, one needs to know how it got that way. Firstly, it was not abraded, it was stamped, work hardening it and impressing the mirror like finish from the die onto its surface. To reproduce this on a sheet of copper, do not scour it with anything that leaves scratches, such as wet or dry paper, abrasive pads or the like. Polish to a smooth shiny surface.The stuff used on copper bottom cooking pans works well. Then slowly heat it in an oven until the coppery color you want develops and remove it, otherwise the color continues to develop. Doing it on a stove top or over a flame heats it unevenly and makes patchy colors rather than an even color.
If you want contrast around the edges or areas where wear would naturally occur, lightly rub it with a lambs wool pad or very gently with a rouge cloth used for polishing silver- easy does it or too much contrast, and especially abrasives will ruin the effect. Give it normal handling and it will soon look “at home” with your nice woodwork.
I had not thought of simply speeding up the normal process with heat. I’ll give this a try. Thanks.
I quite like the darker version at top left as an end point if the darkening stops there.
Not sure if the ageing time would be reasonably short, but starting with a clean surface and watching the surface age naturally could be an option too.
I agree and like for the 10 minute look without brushing.