
Regardless of how much planning you do and how many test runs you accomplish, sometimes things simply don’t go as planned.
So I went out to my shop this morning to check on the progress of my SET amplifier top plate. I expected to see a nice tarnished penny patina. Instead I saw this.
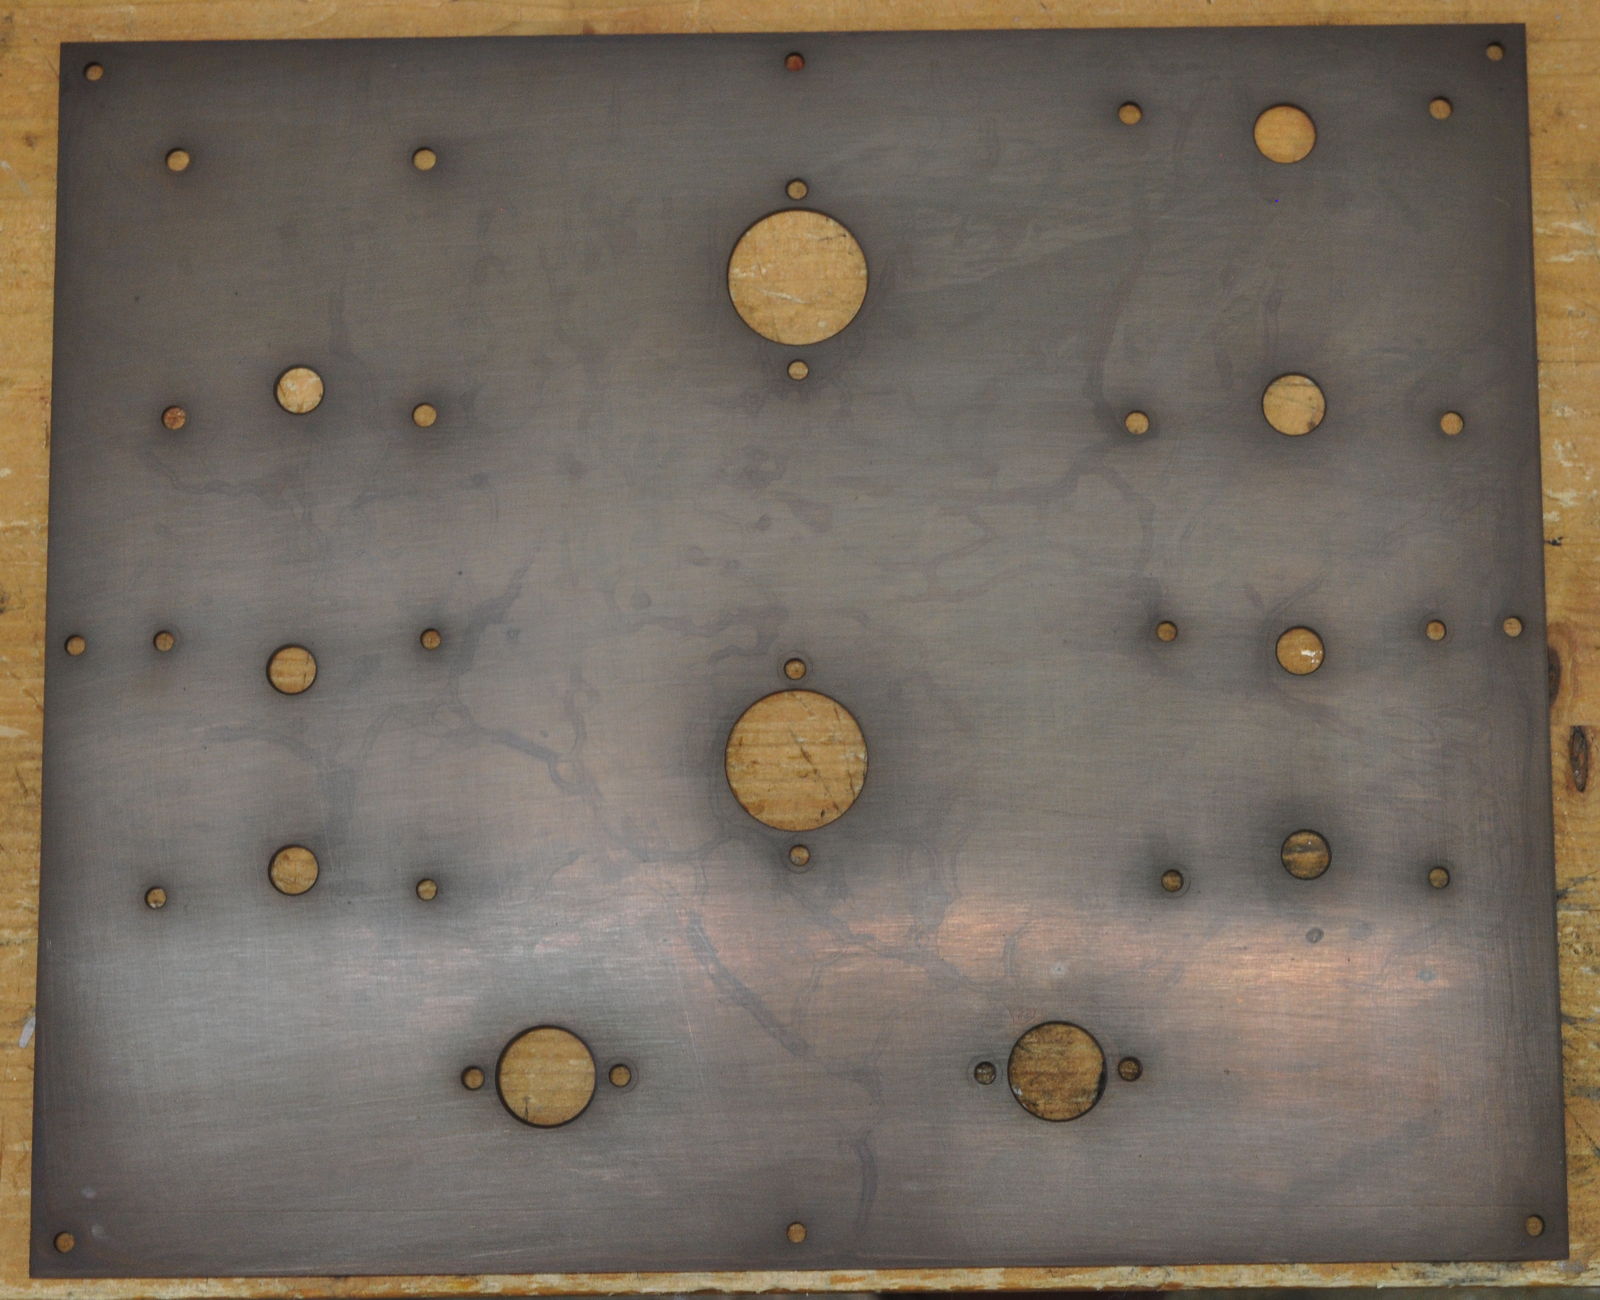
My nice tarnished penny finish looks like it has little worms crawling all over it. Upon contemplation, I have decided that this has to do with the drying process I used. It was the first time I tried the hot air drying and it was because of the size of the plate. I think that as the water dried, residual impurities were concentrated in smaller and smaller rivulets on the metal and when those finally evaporated, they left just enough chemicals in those spots to change the tone.
So I went back to square one, polished the plate again, and went back to the chemical bath. Only this time, I used a simple (very gentle) mechanical drying process so there should be no concentration of impurities on the surface. Here is how it looked after the second attempt.
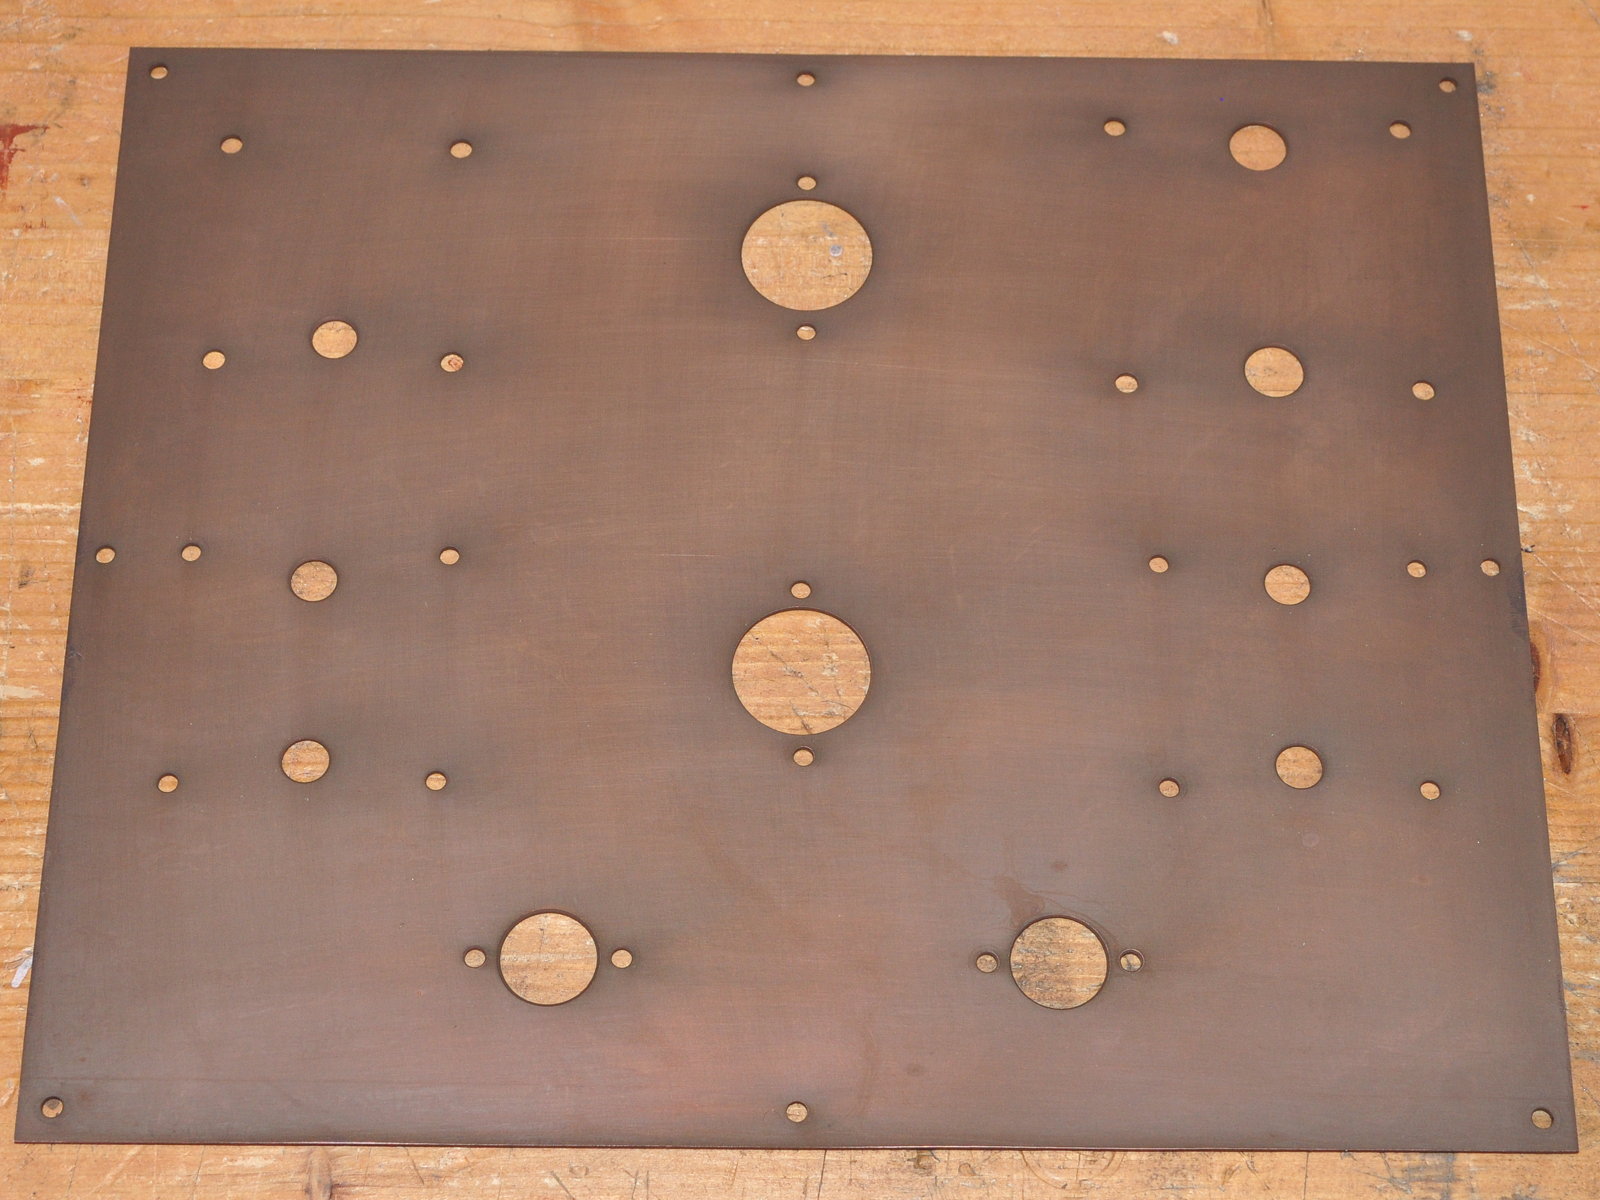
This looks much better and also has just enough variation to give it an authentic aged look. And here is it with the smaller pieces for the front of the amp.

The match with the power switch and indicator light plate is very good. The volume control plate is a little darker and has some spots, but I’ve decided that I really like the variation on that plate. And since most of it will be covered with a volume knob, the differences won’t be very noticeable.
I’ll go out after several hours and make sure things are progressing well. I’m hoping that I won’t have to make a third attempt. But at least I learn something with each failure. Well, back to work.
Questions and comments are always welcome.
Sunday greetings to you Matt. I just stumbled in you site today while doing some background research as I am about to embark on my first tube amp restoration. I acquired a Magnavox Amplifier EL 84 Tube Stereo 9302 – 10 about a month ago and has since been waiting on my variac to arrive to power it up.
Looking forward to reading more of your blogs, and maybe some day in the near future to take on the challenge of building your 6V6 Lacewood Amp (with your permission of course).
cheers!
Michael
Glad you like the site. I’m always happy to help out anyone wanting to build one of my designs.
I have only just now discovered the blog section of the Web Page, Shame on me !…
How reassuring to see that we all have trials & errors on our projects…. I thought I was the only one erring in the desert LOL
The prototype box you were building earlier looks really classy, those angle joints make me so envious… congratulations.
That first attempt on the copper patina was a shocker, good luck with the chassis from now on.