
I had thought that the coupling capacitors I ordered on Tuesday would not arrive until this Saturday. However, the gods of DIY decided to smile down upon me and the capacitors showed up in today’s mail delivery. In my opinion, two days from order to delivery is exceptional. I spent some time this afternoon with a soldering iron in hand and the Color Preamp is now fully assembled.
The preamp has been smoke tested (i.e. powered up) and all is well. Here is how it looks with the tubes installed.
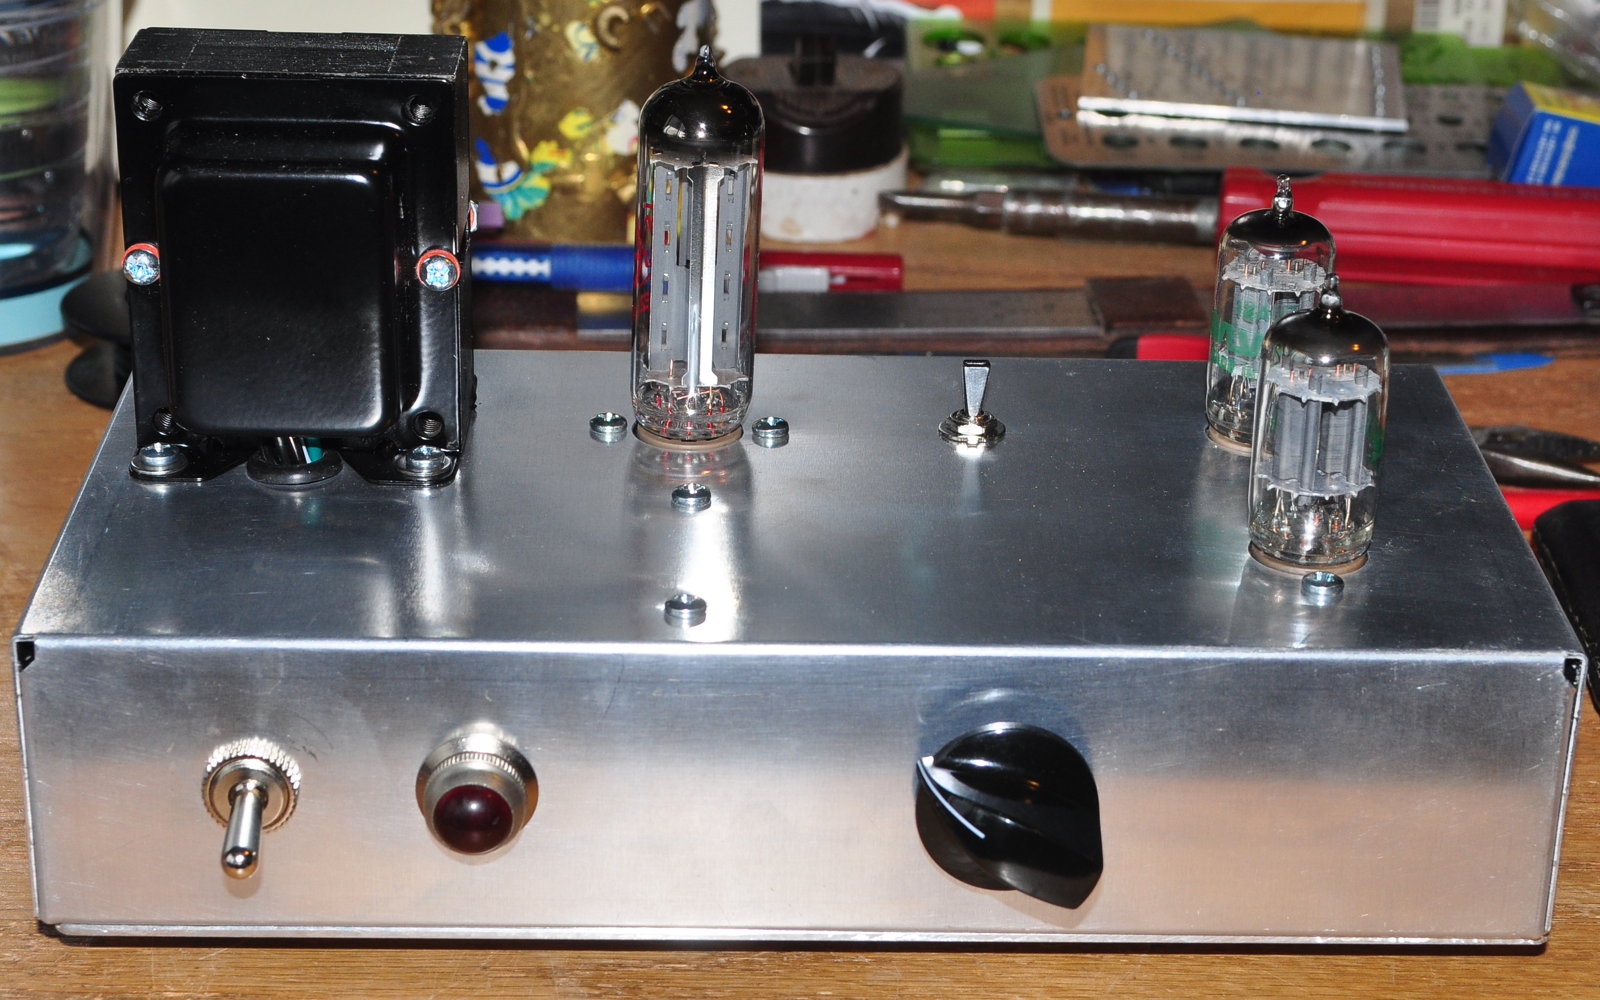
Thats a brand new JJ 6AC4 in the rectifier slot and a pair of NOS Sylvania 12AU7s in the gain stage and buffer sockets. The gain stage is to the rear and the buffer stage is up front. And here is how it looks under the lid.
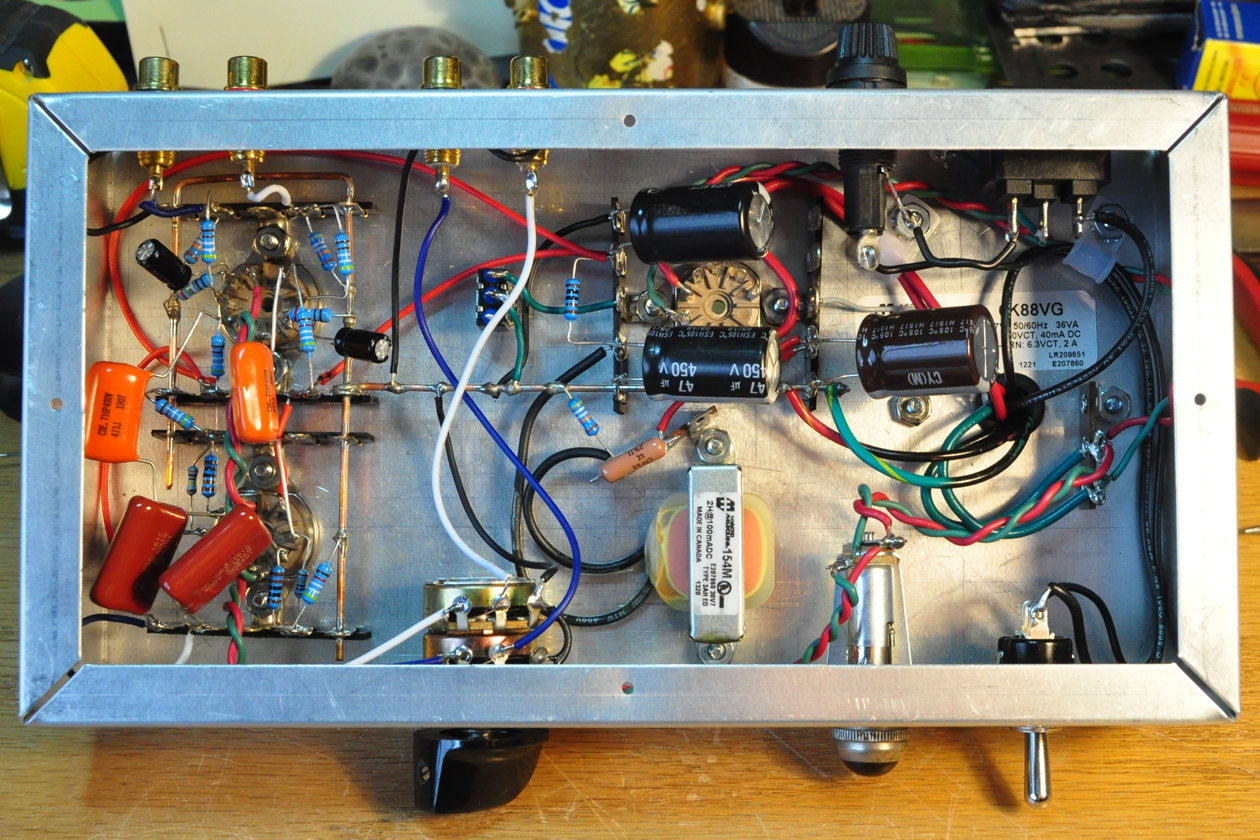
The two final capacitors are in the lower left corner in this picture. You can see how little space was available for these capacitors inside the chassis. But these worked out fine. Heres a better view.
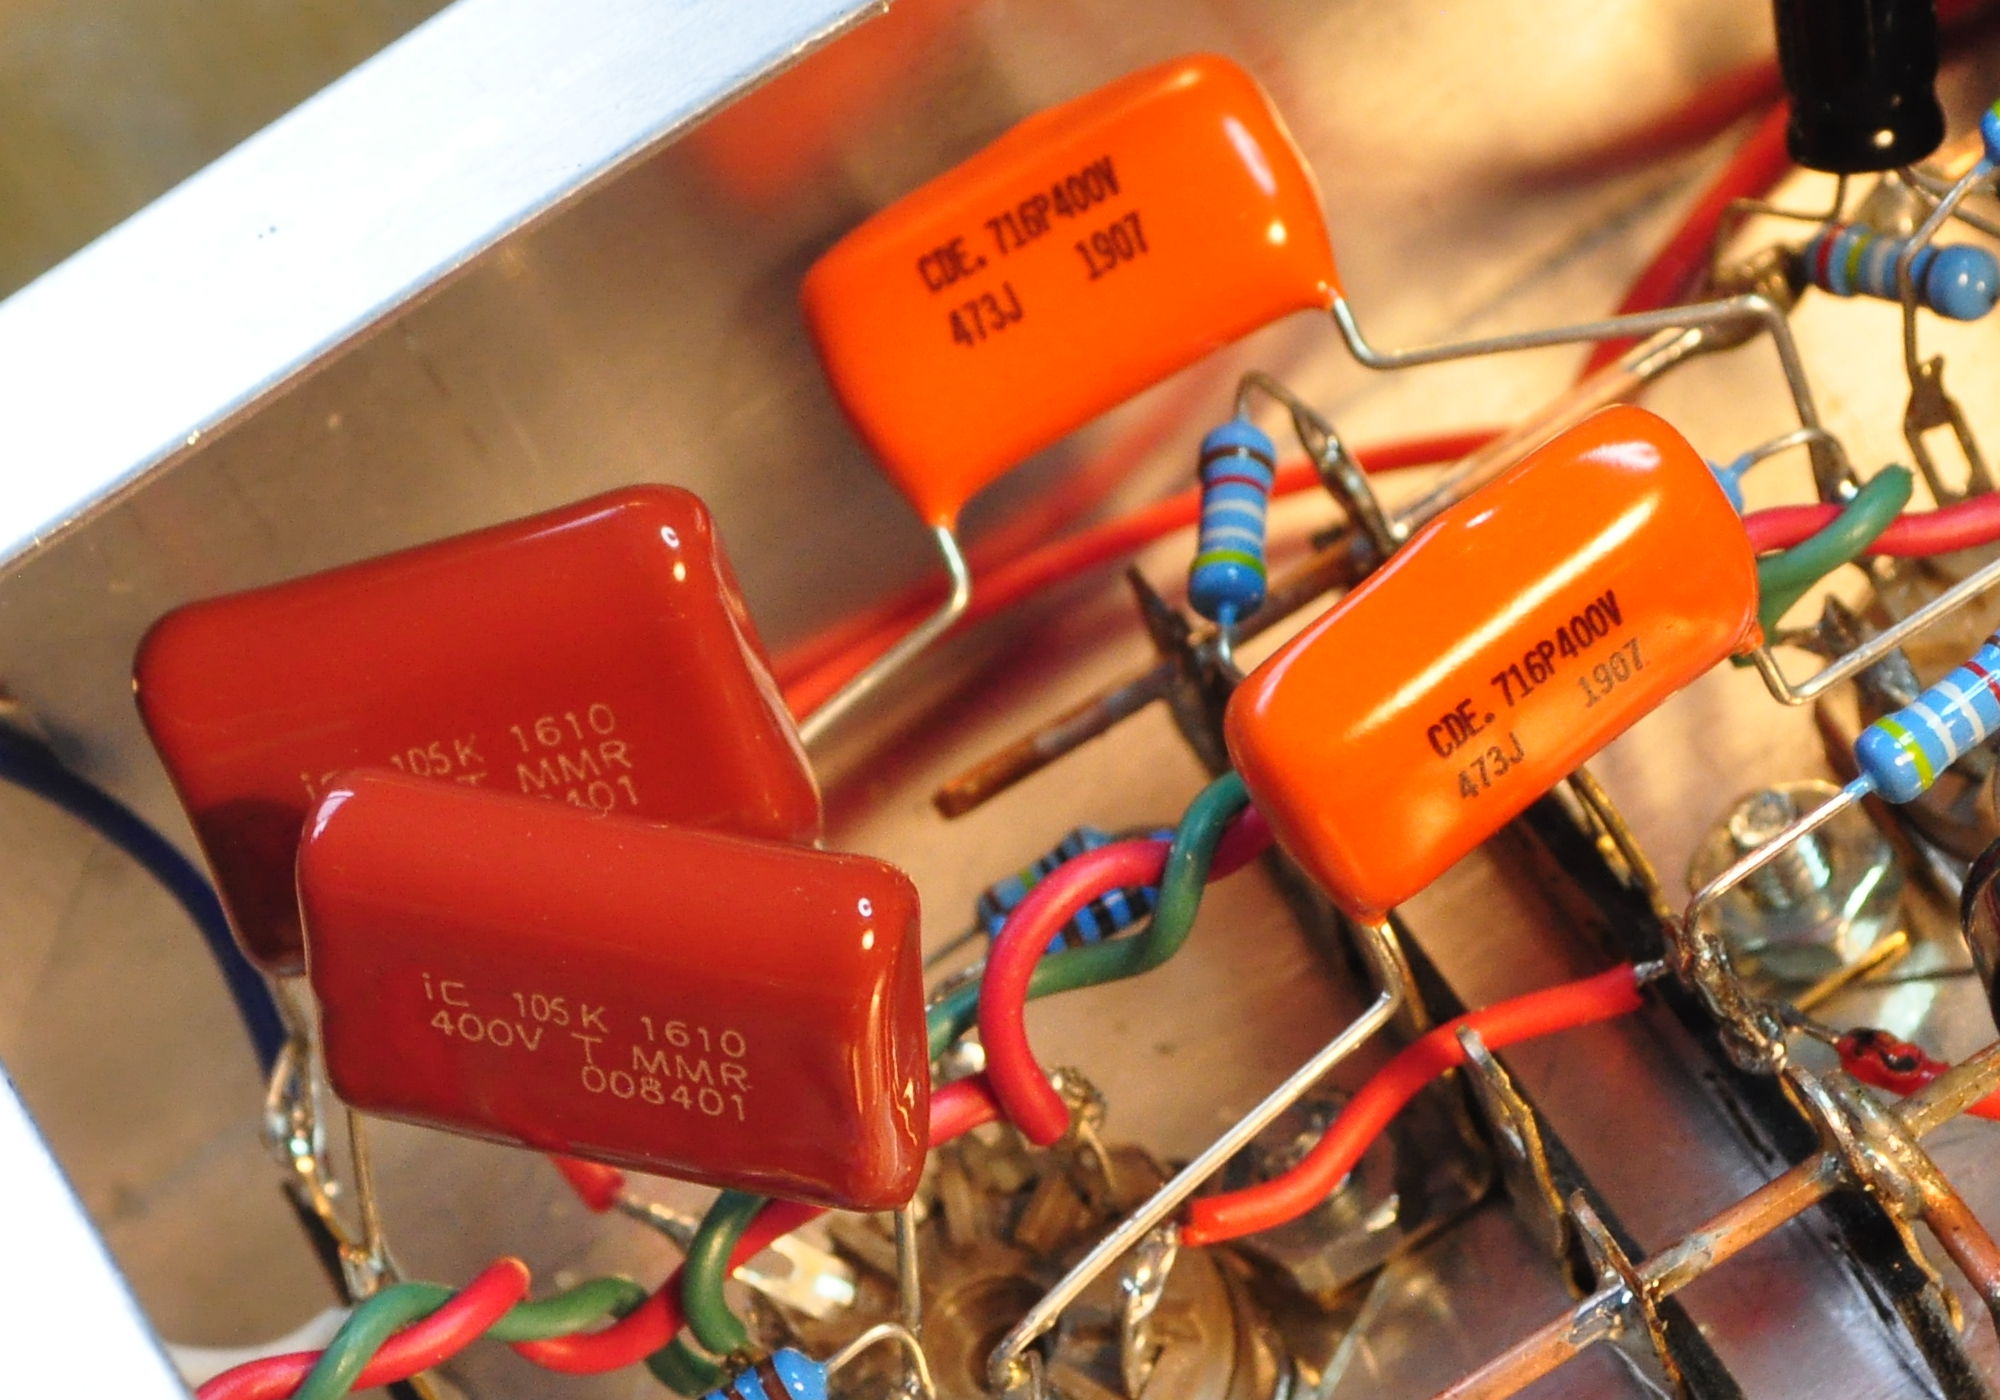
The output coupling capacitors are Illinois Capacitor MMR Series, metallized polyester film capacitors in 400V. In general I prefer the CDE 716 “Orange Drops” as coupling capacitors. However, the 715/716 series capacitors do not include a 1µf value at any voltage over 200VDC. In addition, the MMR series are generally a little smaller than the 715/716 in similar ratings. In this picture you can see my preferred CDE 716 Series “Orange Drop” capacitors between the gain and buffer stages.
It is the relatively low output impedance of the buffer circuitry which drives these large (or relatively so) output coupling capacitor values. In order to get the low frequency response (20Hz) with the low resistances in the output circuit, larger coupling capacitor values are required than one normally uses in tube amplifiers. You can see the coupling capacitors between the gain and buffer stages are only 0.047µf. These are working into a buffer input impedance of over 11MΩ so even these values are probably overkill.
I installed the dropping resistor in the power supply and checked all the voltages before the capacitors arrived today. The B+ voltage is running at a solid 286VDC, This is about 5% below the 300VDC design point but still acceptable. I could have gotten very close to 300V if I had an appropriate 3kΩ resistor available. But all I had were 1/2W rated resistors in 3kΩ and the power dissipation would have been ≈450mW. In my opinion this is not enough margin so I ended up using a 4kΩ resistor rated at 1.5W. Total power dissipation in the 4kΩ resistor is slightly over 600mW so there is ample margin.
I checked all the bias and plate voltages and everything looked acceptable. Now I need to clean my workbench and shift over to testing the preamp. This will probably take a couple of days.
One more thing. When powering up the preamp I got a pleasant surprise which I had not anticipated. The glowing filaments are reflected on the bare aluminum chassis around all three tubes. In subdued light it really adds to the “tube glow” of the preamp.
As always, questions and comments are welcome.
This idea and project came together well. It’s been a long time since I have used a preamp, the transistor ETI 5000 kit project to use with my Quad 405 years back. In addition to my tube amp for serious listening these days, I use a class d amp now mainly as background music or while watching movies with a decent soundtrack. I can see the colour preamp could be a must have in this situation which could even support the class d amp for critical listening as well.
Yes this project came together fairly well right up until I started AC testing. The circuit is not behaving as I had originally intended. Don’t get me wrong, it seems to work fairly well, but it has an input level limitation I did not anticipate. It’s well above +4dBu (1.228 v-rms) so I don’t think it’s an issue for a line amp, but it is not as I intended. And it’s not an issue with the gain stage but a buffer limitation. When I get the theoretical situation nailed down, I’ll have to explain it all in another post.