
While spray painting some metal this week a funny thing happened. During the painting session, the hair on my arms began to stand on end to the extent that it was readily apparent that something strange was happening. This led me to perform some investigations.
It was actually pretty clear what was happening. The spray can has a nozzle which atomizes the paint as it leaves the can. Each of these individual drops carry a small amount of electrical charge away from the can. These charges then accumulate on the parts being painted. The cumulative transfer of charge from the can (and my body) to the item being painted left a significant net opposite charge on my person. Especially given the nice rubber soled (i.e. insulating) shoes I was wearing. This is actually the same effect utilized by physicist Robert A. Millikan in his famous “Oil Drop” experiment allowing him to calculate the unit charge on an electron. It’s also a key aspect of the application of material in the powder coating process.
What I found really amazing was that the magnitude of the charge transfer was great enough for me to notice it in such a striking manner. It also explained a drying behavior that I have noticed for some time while spray painting.
When I spray paint metal I typically inspect the parts immediately after spraying. Usually I find a nice clean application of paint. Then I suspend a clean cover an inch or two above the parts to keep dust from settling into the paint. After several hours I remove the cover and inspect the part. Typically I find major dust motes and even small fibers have settled into the now dry paint. It’s universally frustrating.
But now I had a question. Was the painting process itself building up enough of an electrical charge on the metal parts that they were attracting floating dust and other material randomly floating in the air? And if so, could the effect be effectively mitigated.
I thought what I really needed to test my hypothesis was a conductive path between the parts being sprayed and the spray can. It doesn’t even need to be a particularly low resistance path. Just enough to allow the charge states to equalize between the parts and the applicator during the spraying process.
The first issue was how to connect a wire to the parts without affecting the painting process. This was actually fairly simple to do. I simply spread a sheet of aluminum foil under the parts. A folded edge gave enough bulk to effectively connect an alligator clip. It looks like this.
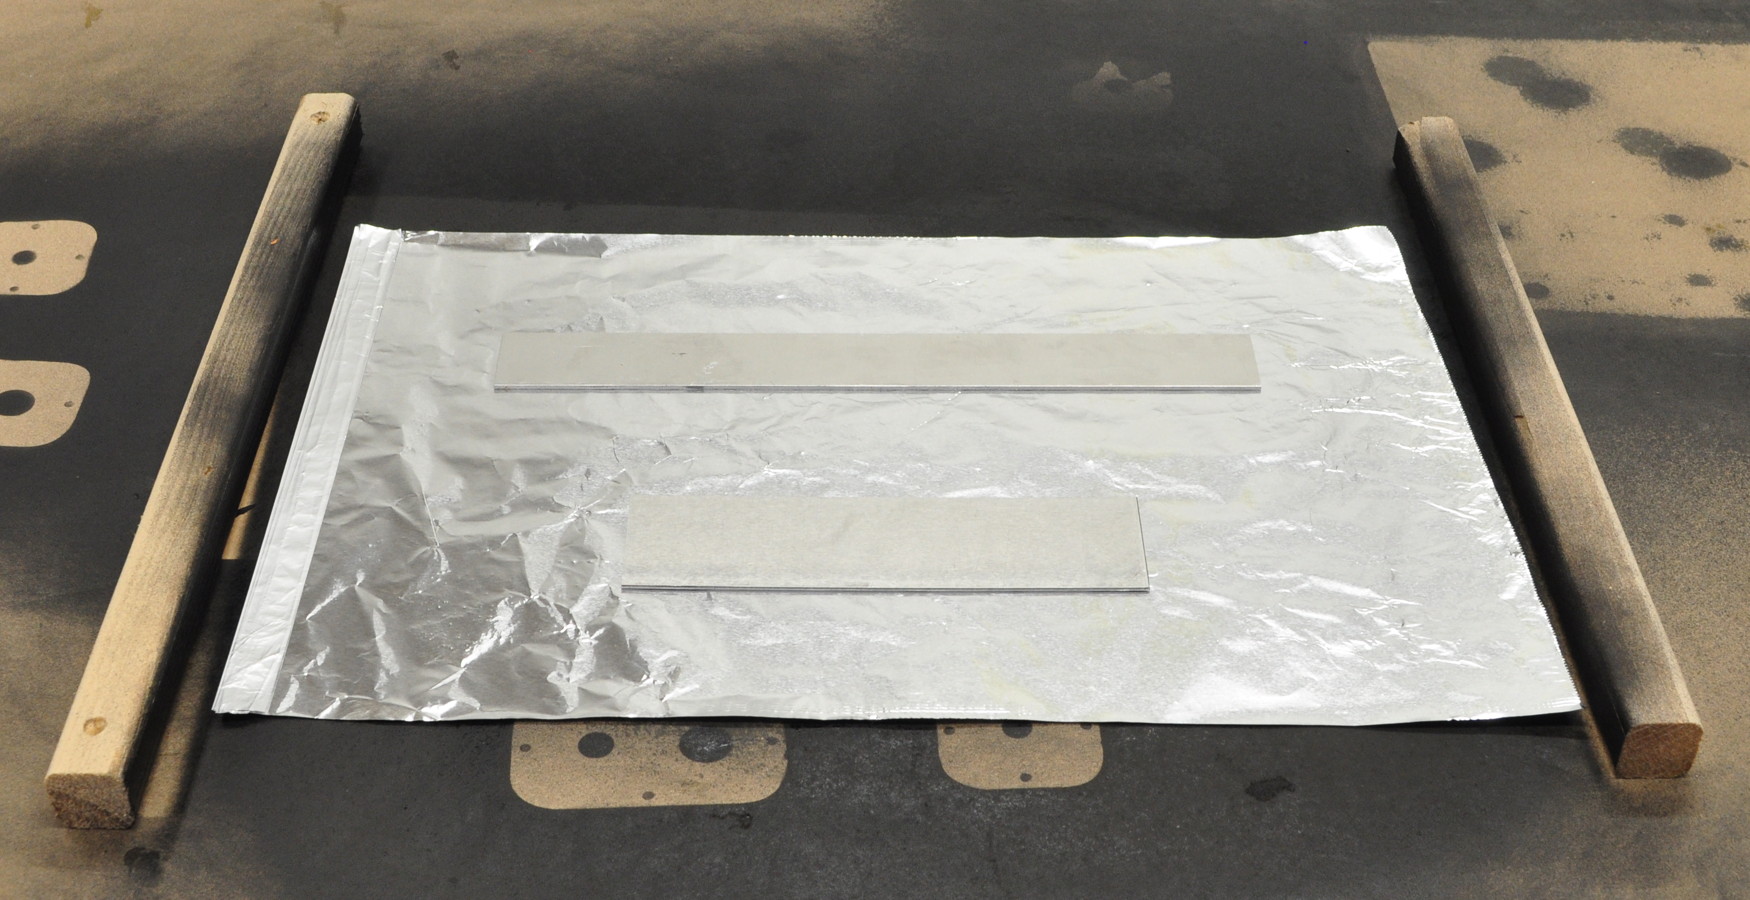
The two test part are simply laid on top of the foil. The two pieces of wood are support for my dust cover. After I did this it was a fairly simple matter to connect a wire between the foil and the exposed metal edge on the bottom of the spray can. Here is what my total setup looked like.
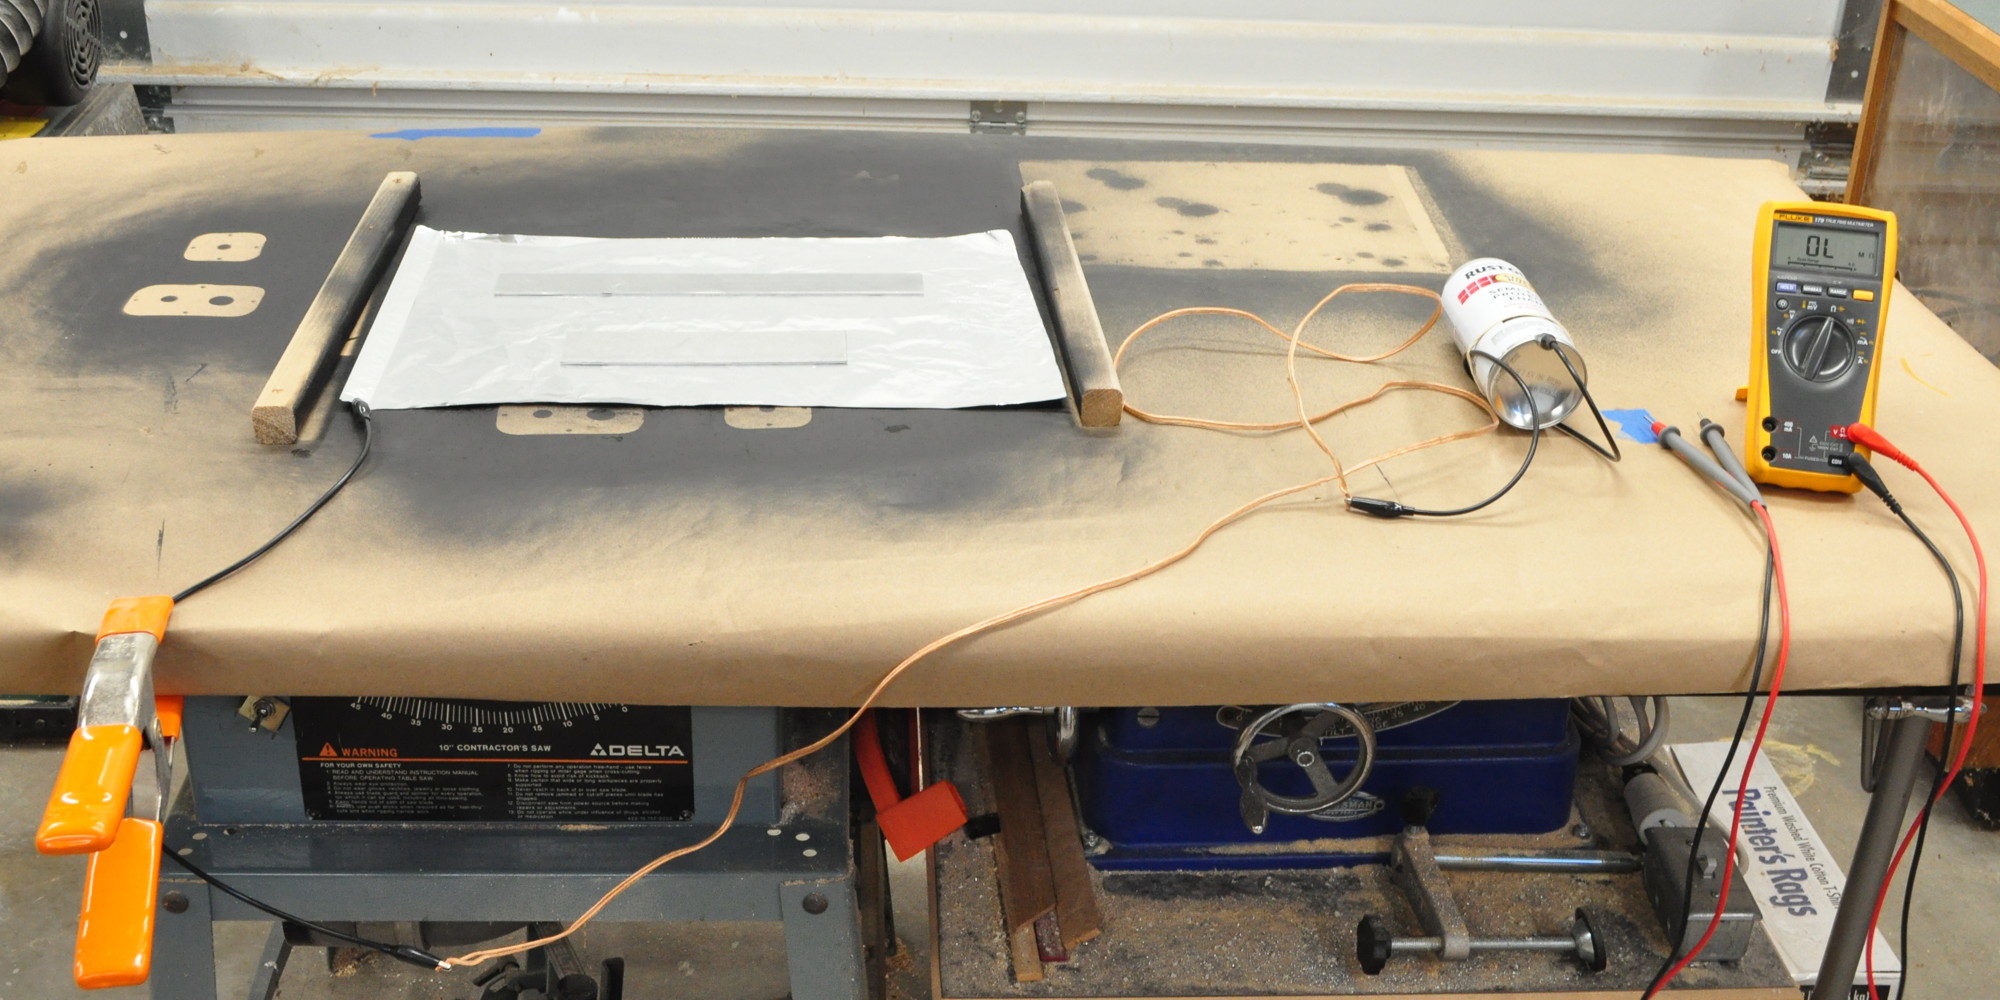
It’s just two simple alligator clip test leads and a length of spare speaker wire. I clamped the wire to the table and used a rubber band to secure the wire to the can. I didn’t want to rely on the strength of the clip leads if I managed to tug on the wire while painting. Checking the continuity between each part and the spray can gave readings of 0.3Ω and 0.4Ω.
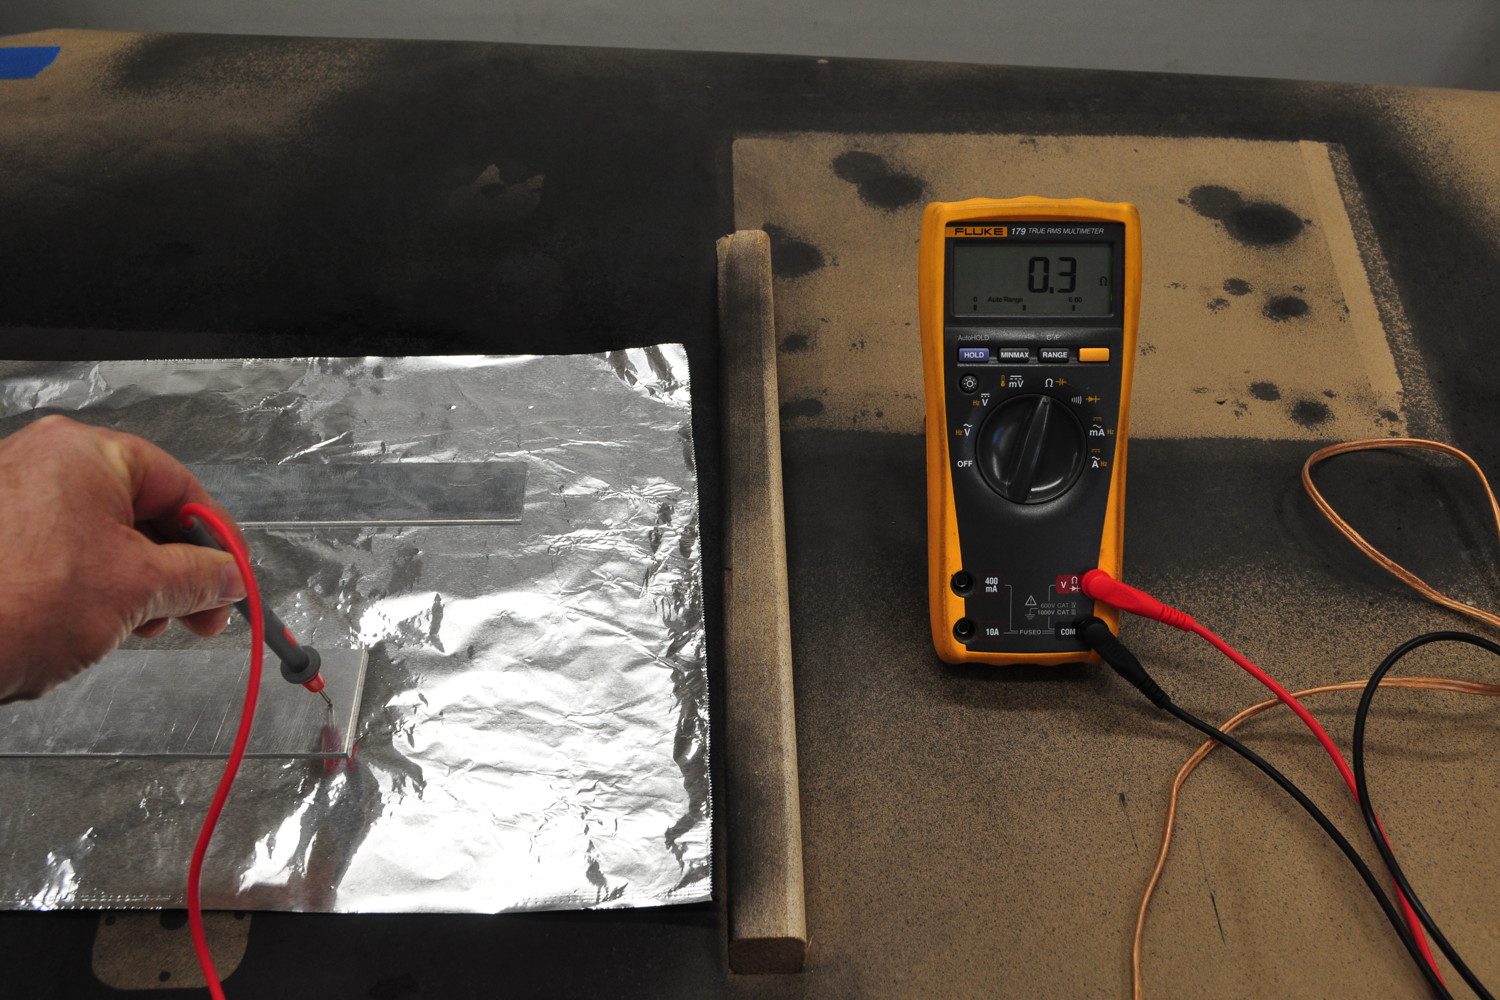
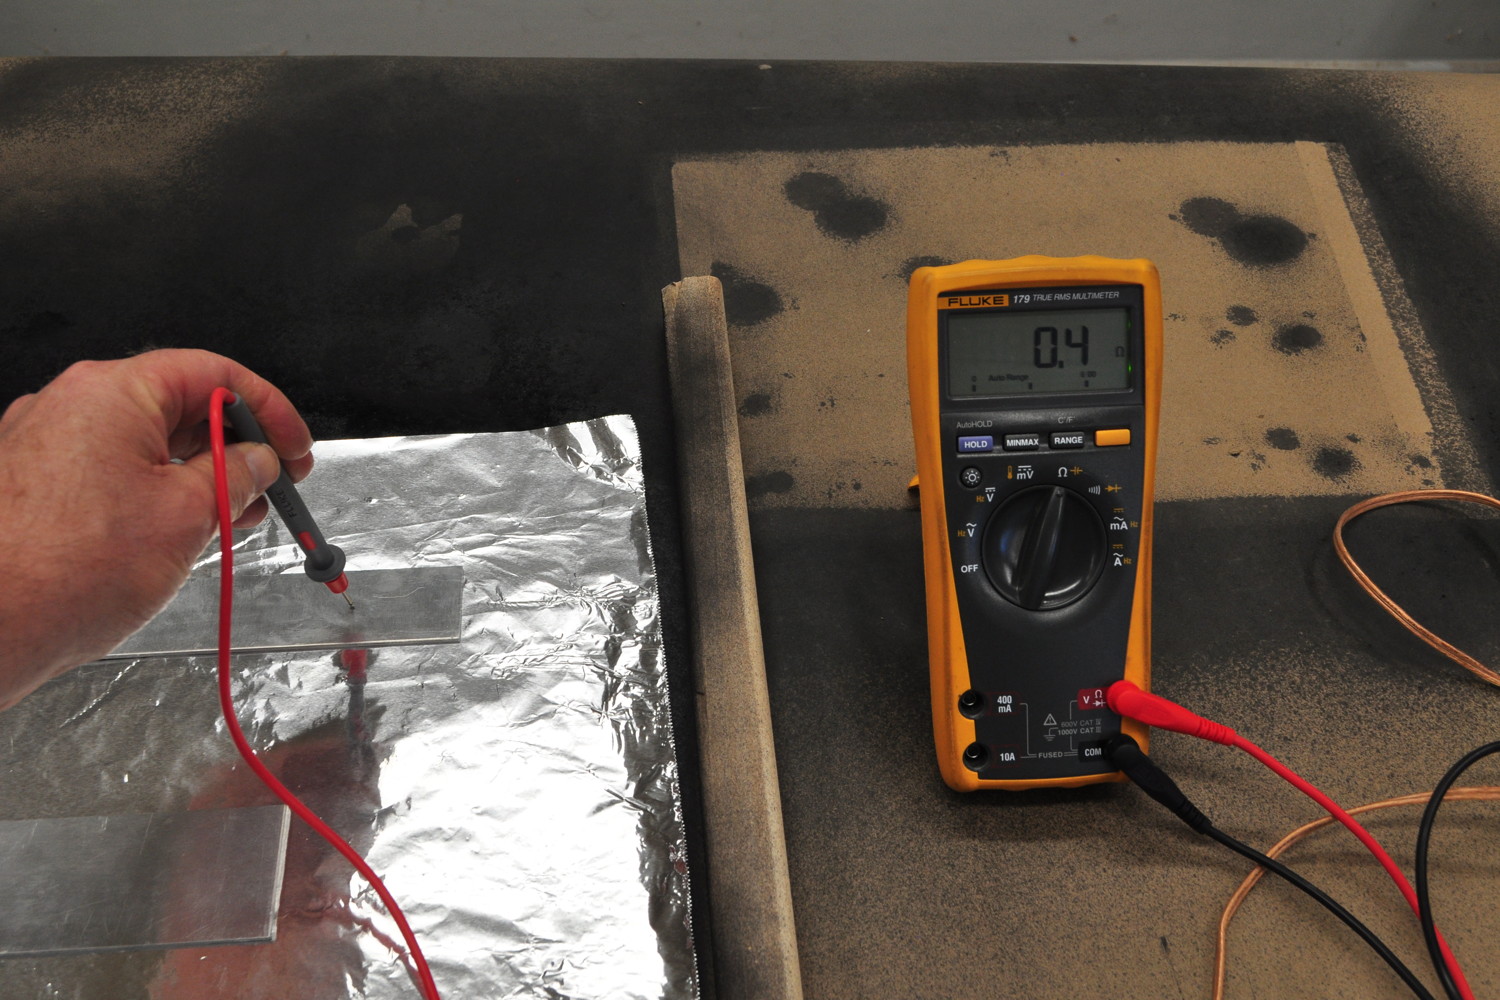
These resistances should allow excellent charge balance to be maintained between the parts and the can. As a final preparation before I started, I grounded myself and the spray can to a good Earth ground in my shop to minimize initial excess charge on the apparatus.
After all this, I simply painted the two parts as I normally do. The first observation was that there was no hair standing up on my arms. I looked at the paint application when done spraying and the finish looked very clean and even. So I covered the test parts with a dust cover and disconnected the wire from the can.
When I came back several hours later and removed the dust cover I was shocked at the difference. There were a couple of small dust motes but most of the finish looked very smooth and even! Had I done the usual misting and cleaning of the paint area that I usually perform, I am sure that the finish would have been near perfect. I could even improve the process by tying the electrical charge wire directly to Earth ground while spraying to maximize the electrical neutrality of the entire setup.
I’m actually kind of surprised that it took me this long to realize that this was happening. However now that I know about it, I can take steps to mitigate the problem. Hopefully this will significantly increase my success rate while spray painting metal parts in the future.
As always, questions and comment are welcome.
Pingback: New Preamp is Moving Forward | Cascade Tubes