
The paint seemed to be good and hard this afternoon. So when I got a little free time, I decided to start assembly.
All the transformers, sockets, terminal strips, and other miscellaneous parts are now mounted on the top plate. This is the first opportunity to really get a look at how this amplifier is going to look.
Here’s what the amplifier looks like from the top. This light is a little harsh. I’ll get better photographs when the amp is fully assembled.
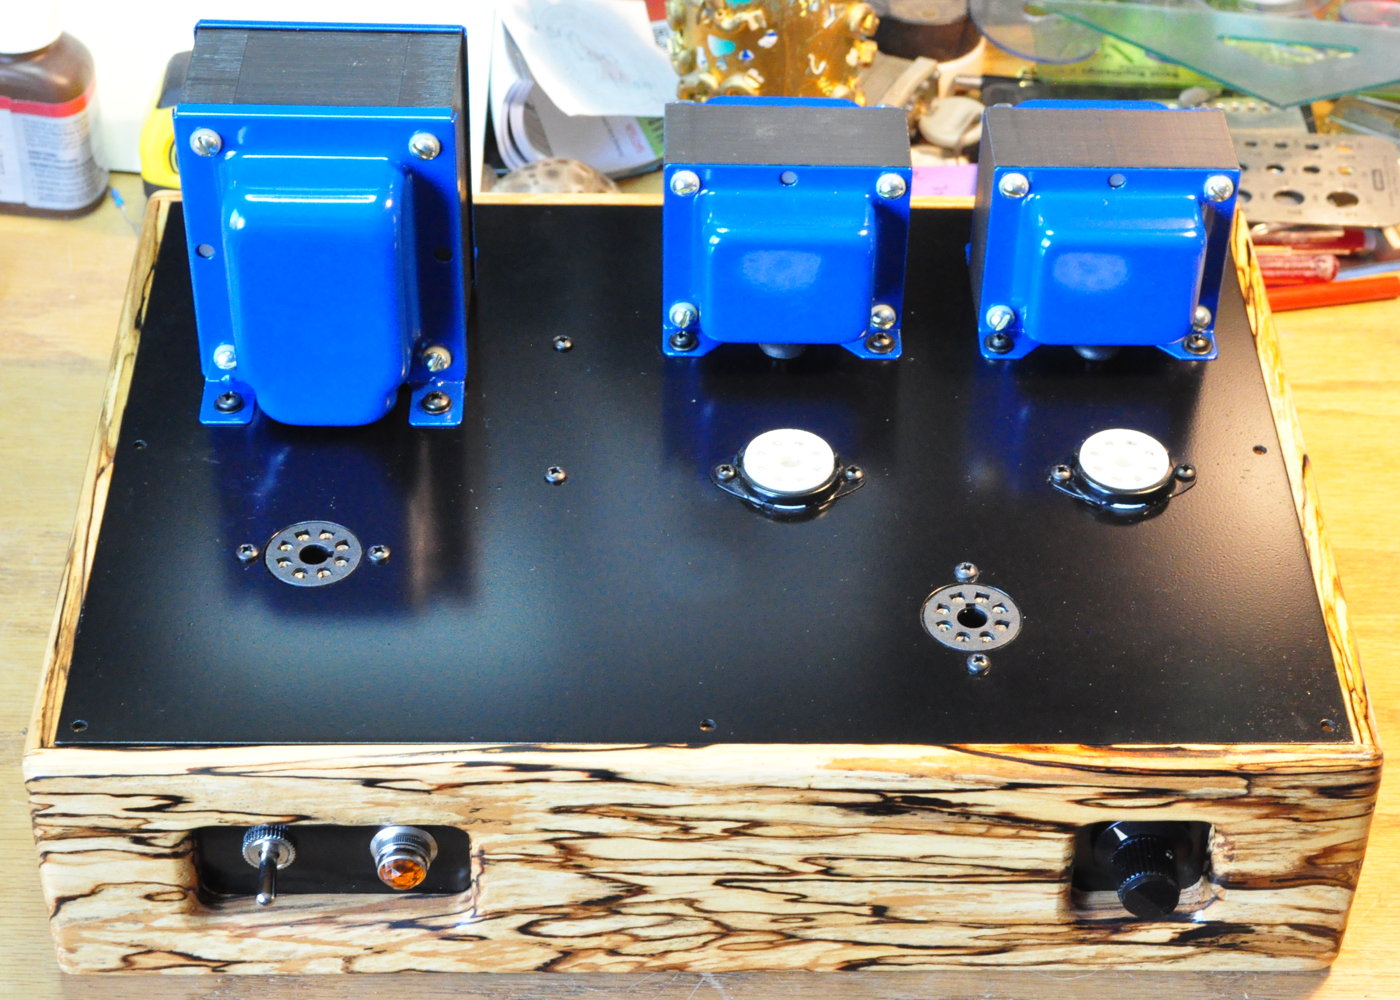
Note that there are two different types of octal sockets on the top. The normal black sockets will handle the GZ34 rectifier and the 6SL7 driver. But since I wanted to tube roll some KT88s in place of the normal 6L6GCs, I decided that I wanted sockets which could take a little extra heat. So the power tube sockets are ceramic and top mounted to lift the power tubes off the top plate. The underside isn’t quite so neat.
There are a lot of terminal strips under the top plate. These are to support the heavy ground buss and the five very large JJ 500V filter capacitors. The next steps are installing the ground buss, wiring the transformers into place, and running the filament wiring.
As always, questions and comments are welcome.
The unterminated transformer wires are what makes it look untidy. The layout looks to be typical of your past projects. Looks good to me. No worries.
It looks pretty neat to me. You have used nearly every available nut to fix a terminal strip which I think is an excellent idea. I never plan well enough and as a result I have to do quite a few mid-air solder joints. Do you plan all component placing before you start?
Yes I do. Here is my current component layout diagram for this amp.
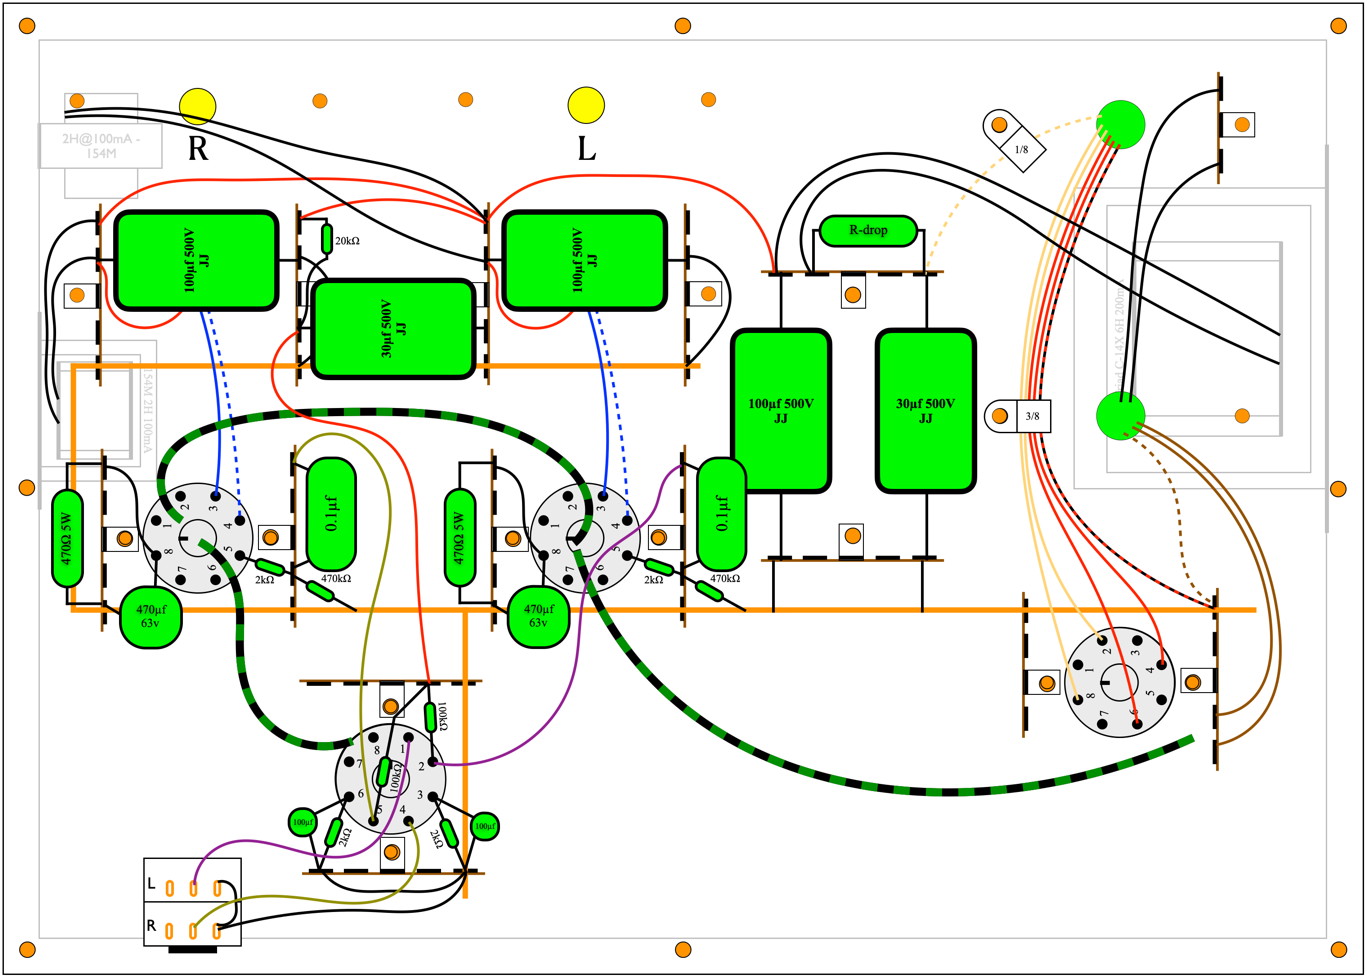
Yep, that is well planned. I’ll probably start doing the same but with pen and paper. Looking forward to seeing the finished product.