
Well, eleven days since my last post and the cedar fence is done, the garden is in, a toilet has been replaced, and a new batch of black cherry cider is in the fermenter. So I decided it was time to get back to the metal for the source selector unit.
Unfortunately, the metal doesn’t look all that much different than it did eleven days ago. The only real difference is that all the hole locations are center punched and ready for drilling.
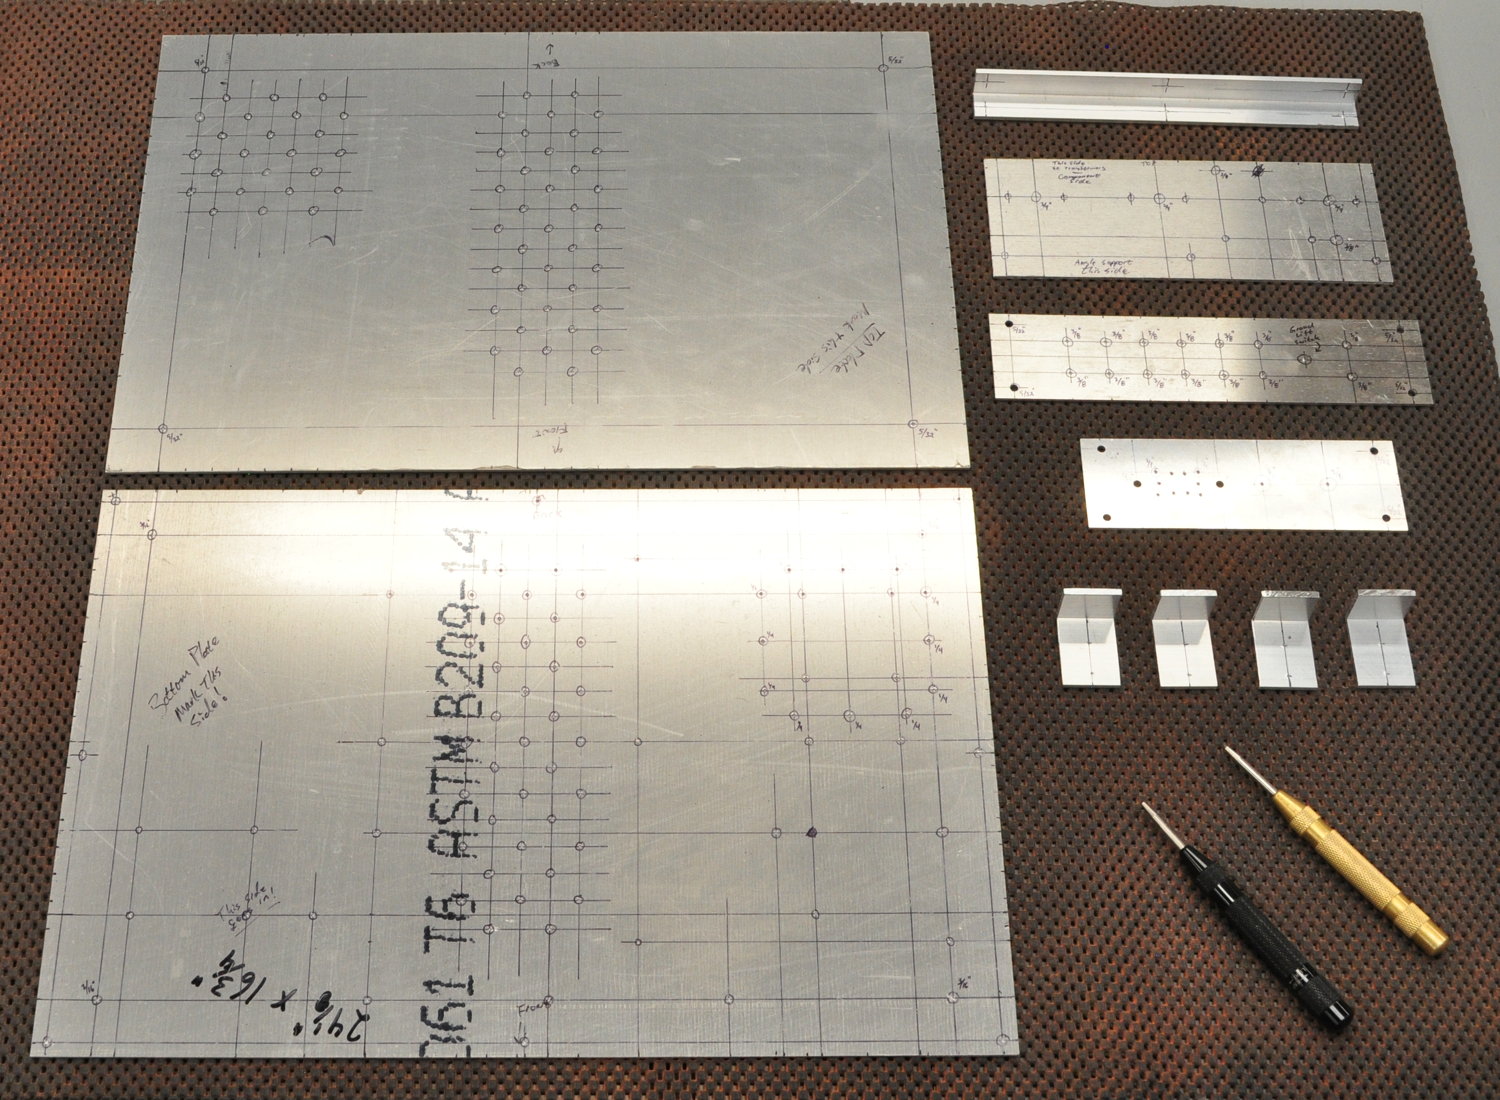
The reason I didn’t get any drilling done this afternoon is due to those two little automatic center punches in the lower right cornet of the picture above. Let me explain.
When I went to start marking the hole locations, I found that my automatic center punch was not working. I could compress it but it wouldn’t “fire” and deliver the mark to the metal. So I grabbed my backup punch and then remembered that that one had stopped working when I was punching hole locations last time.
For those who aren’t aware, the automatic center punch is one of the true wonders of modern civilization. The punch has a hardened metal tip which, when placed against a piece of metal (or anything else) and then compressed, delivers a sharp blow to the surface it’s held against. In metal this forms a small divot which is ideal for starting a twist drill without having the bit walk around on the surface. It performs this wondrous feat using an ingenious little mechanism with a couple of springs and some little metal parts. The really nice thing about this is it’s a one handed operation. This leaves the other hand free to hold the workpiece and help getting punch alignment just right. Something you can’t do with a fixed punch and a hammer.
However, like most mechanical devices, these punches are susceptible to internal wear and periodically need to be “tuned up” so that they work properly. Both of mine were in need of such a tuning. The usual cause for a non-functional automatic center punch is wear on the small slug of metal which comprises the internal “hammer” which delivers the blow to the rear of the hardened point. The hammer is just a little slug of metal that slides inside the tube. In one end there is a centered hole. The issue arises when the edges of that little hole become worn and slightly rounded.
The solution is simple but tedious. To fixed the problem, the end of the hammer slug needs to be trued up so that the edges of the central hole are once again sharp. For people without a metal lathe or milling machine, this is accomplished by placing some fine sandpaper on a hard surface (or using a nice flat oil stone) and dressing the end of the hammer by hand until everything is flat and sharp again. Unfortunately the little hammers are small, difficult to hold, and fairly hard. I could have made a jig to help, but that would have taken even more time. So I just went to work and slowly worked the ends of the two hammer slugs until the edges of the holes were square and true. After that it was a simple matter to reassemble both punches and get back to work.
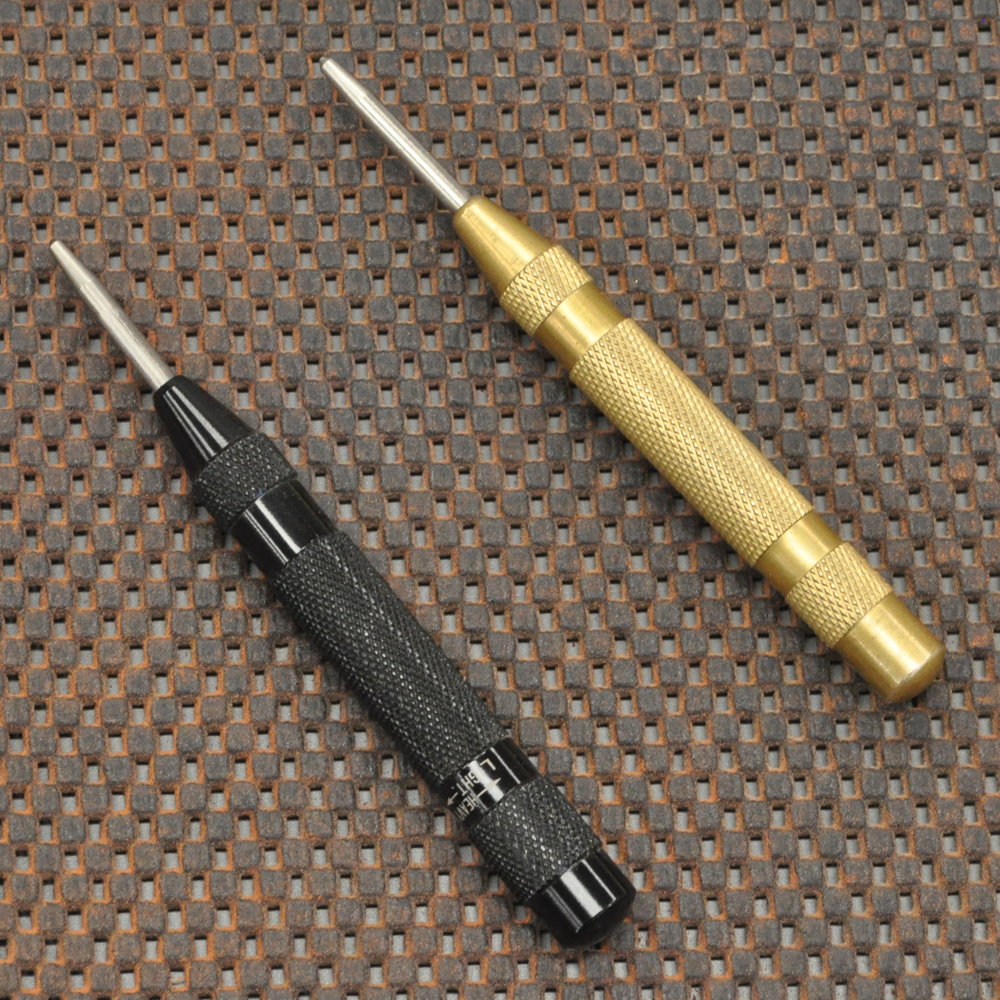
The results were great and both punches now are functioning correctly. However, this little task actually ate up about an hour of shop time. This left little time to actually get the drill press set up and start drilling holes. So I decided to let that job wait until tomorrow.
With any luck, in a few days I’ll be able to show you all the drilled metal. Then it will be time to start finishing work on both the metal and the nice bubinga chassis. Things are beginning feel like the project is coming together.
As always, questions and comments are welcome.
I have the same punches…both of mine are the gold color. Over the last year or so they’ve started failing just as you described. Hopefully I can figure out how to revive following your description…🤔
I’ve had these punches more years than I want to admit; perhaps 30. Are they still made today?
Usually you can buy an automatic center punch at most hardware or auto parts stores (at least in the US). I always get the inexpensive ones. But I’ve thought about dropping the funds to get a nice Starrett but it seems like a lot of money for the amount I use them. Maybe if I was a machinist instead of a just a tinkerer.